3 N2W Server Instance Configuration
3.1 N2W Server Instance Connectivity
For the configuration process to work, as well as N2W’s normal operations, N2W needs to be able to “talk” with AWS APIs. Thus, it needs to have outbound connectivity to the Internet.
Verify that the N2W instance has Internet connectivity; this can be achieved by placing the instance in a public subnet with a public IP address, by assigning an Elastic IP to the instance, using a NAT instance, or by using the Internet Gateway. You also need to make sure DNS is configured properly and that HTTPS protocol is open for outbound traffic in the VPC security group settings. It is by default.
3.2 Creating an Instance When Launching through EC2
Under the Name and tags section, enter a name for your instance in the Name box.
If required, select Add additional tags.

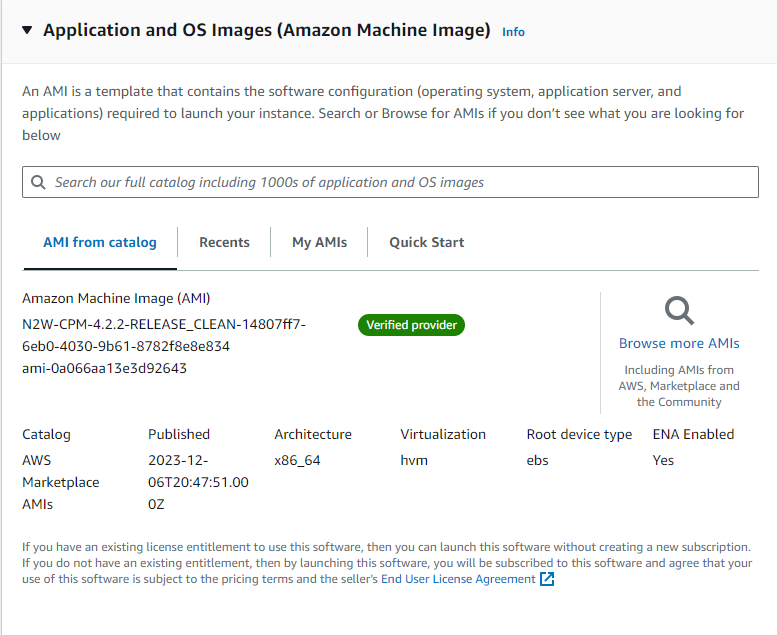
2. Under Application and OS images (Amazon Machine Image), leave all default values, as this section shows what AMI we are using for the EC2 instance image.
3. Under Instance type, the recommended minimum size is t3.medium. However, for bigger environments, the type may need to be larger.
For information on choosing the appropriate size, see https://n2ws.zendesk.com/hc/en-us/articles/28811725028125-Recommended-instance-sizes-and-volume-types-for-N2W-Servers

4. Under Key pair, you can create a new key pair or use an existing one. The key pair is used when connecting to the instance’s CLI.

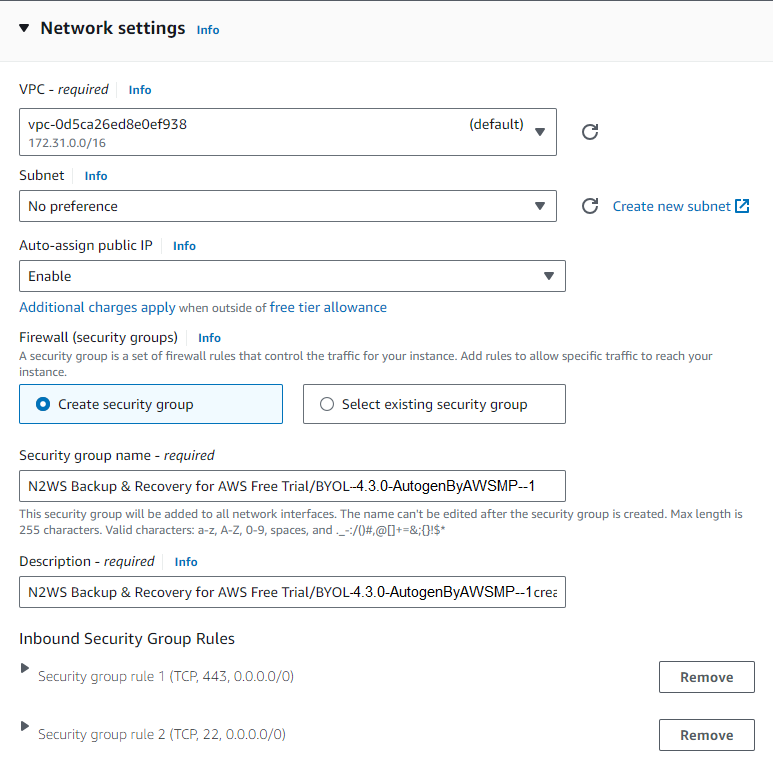
5. Under Network settings, select a relevant VPC, Subnet, and Security group for the instance. For the configuration process to work, as well as for normal N2W operations, N2W needs outbound connectivity to the Internet for the HTTPS protocol. Needed are:
A public IP, or
An Elastic IP attached to the instance, or
Connectivity via a NAT setup, Internet Gateway, or HTTP proxy,
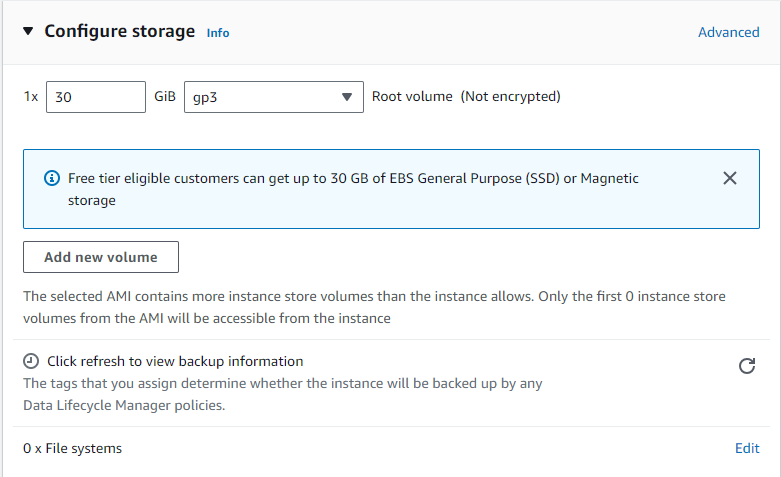
6. Under Configure storage, keep the Root volume as 30GB, but change the volume type to General Purpose SSD (GP3). You can also encrypt the volume with a default or custom managed KMS key.
7. Under Advanced details, the only mandatory field to change is the IAM instance profile. Create a new role to give the EC2 instance the minimum permissions needed to perform its functions. See https://n2ws.zendesk.com/hc/en-us/articles/28832964188573-Required-Minimum-AWS-IAM-permissions-for-N2W-operations
8. Select Launch instance.
3.4 N2W Server Instance Configuration
For N2W to work, JavaScript needs to be enabled on your browser.
N2W has a browser-based management console. N2W supports Mozilla Firefox, Google Chrome, and Safari.
After launching the N2W AWS instance, use the AWS Management Console or any other management tool to obtain the address of the new instance:

Use the address provided to you by N2WS to connect to the N2WS Server using the HTTPS protocol in your browser (https://<server address>).
When a new N2W Server boots for the first time, it will automatically create a self-signed SSL certificate. After the initial configuration, it is possible to upload a different certificate. Since the certificate is unique to this server, it is perfectly safe to use. However, since the certificate is self-signed, you will need to approve it as an exception for the browser. To add an exception for the default certificate in Chrome and Firefox, see Appendix B – Adding Exception for Default Browser.
After adding the exception, you get the first screen of the N2W configuration application.
3.3 N2W Server Configuration Wizard
The N2W Server Configuration wizard takes you through the process step by step. There are a few differences between configuring N2W for the Free Trial and other paid editions.
For the N2W Free Trial Edition:
A new volume must be defined for the N2W server.
You will need to enter a user name, a valid email address, and enter a password and verify it.
For other N2W Editions:
Step 1: Verify ownership of the new instance
On the first screen, you will be asked to type or paste the instance ID of this new N2W instance. This step is required in order to verify that you are indeed the owner of this instance.

Select Next. In the next step, the N2W configuration procedure begins.
Step 2: Approve the N2W license agreement
Review the end-user license terms, select the acceptance checkbox, and select Next.

Step 3: Configure the license type, N2W “root” account password, and user information

For the Free Trial, leave the License list with the default. If you purchased a license directly from N2W Software, choose one of the License options, according to the instructions you received.
If anyone in your organization already installed an N2W Free Trial in the past on the same AWS account, you may receive an error message when trying to configure or connect to N2W. Contact [email protected] to resolve.
If you are using one of the N2W paid products on AWS Marketplace, you will not see the License field.
If this is an upgrade, the username must remain as it was prior to the upgrade, but the password can be modified.
Passwords: N2W does not enforce password rules. However, it is recommended that you use passwords that are difficult to guess and to change them regularly.
When you have completed entering the details for Step 3, select Next.
Step 4: Time zone, new volume, force recovery mode, and web proxy settings

Choose your time zone.
If configuring a paid edition, choose whether to create a new data volume or use an existing one. To configure an additional N2W server, in recovery mode only, choose an existing data volume and select Force Recovery Mode. In Step 5, you will be presented with a list of existing N2W data volumes.
The N2W server configured for recovery mode will NOT:
Perform backups.
Copy to S3.
Have Resource Control management.
Perform any scheduled operations.
3. If you select Enabled for Connect via Web proxy, additional boxes appear for defining the proxy:
4. Select Next.
Step 5: Data volume type and encryption, security settings, and anonymous usage reports
If you are configuring a new data volume, you have an option to encrypt N2W user data. Select Encrypted in the Encrypt Volume drop-down list and choose a key in the Encryption Key list. You have the option to use a custom ARN.
Volume capacity should be at least 10 GB, which is large enough to manage roughly 50 instances and about 3 times as many EBS volumes.
If your environment is larger than 50 instances, increase the volume at about the ratio of 1 GB per 10 backed up instances.
Volume type should be at least GP3.

2. If you chose to use an existing volume or selected Force Recovery Mode in Step 4, you will see a drop-down volume selection box.
3. Complete the Web Server settings. The default port 443 is used by the N2W manager.
4. Allowing anonymous usage reports will enable N2W to improve the product. The usage reports are sent to N2W with no identifying details in order to maintain customer anonymity. You can disallow the anonymous reports at a later time in the N2W General Settings menu.
5. Select Next when finished.
Step 6: Register the account with N2W

Registration is mandatory for free trials and optional for paid products. N2W recommends that all customers register, as it will enable us to provide faster support. N2W guarantees not to share your contact information with anyone.
If you have a Reference Code, enter it in the Ref Code box.
WARNING: Use English characters only in registration. Non-English characters (e.g. German, French) will cause the operation to fail.
Select Configure System when finished. The Configuring Server message appears.
The registration and configuration process may take a while, after which a ‘Configuration Successful – Starting Server …’ message appears. It will take a few seconds for the application to start.
If, for any reason, you are not directed automatically to the application login screen, reboot the instance from the management console.
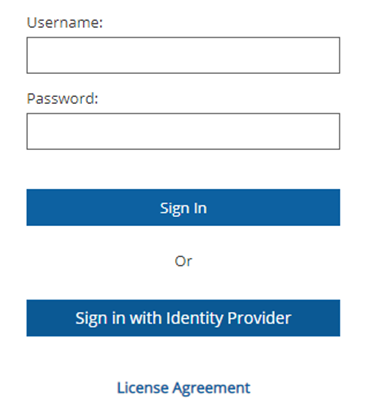
You are now ready to log on with the credentials you created in the first screen and begin using N2W. Selecting Sign in with Identity Provider will redirect you to the organization’s IdP system using SAML.
Logging on for the first time with a trial edition can take up to 5 minutes as N2W must connect and get approved by our licensing service.
The “Please wait …” message should go away in a few minutes. Allow 4-5 minutes and then refresh the screen.
Last updated