4 Creating a Simple AWS Backup Policy with N2W
For instructions on how to quick start using Azure with N2W, see section 7.
N2W automatically creates your first AWS account and policy. The required cpmdata policy is used to back up the N2W data volume.
You can create additional accounts by following the instructions in section 4.1, or see https://n2ws.zendesk.com/hc/en-us/articles/28829961679901-How-to-add-an-additional-AWS-account-to-N2W-for-Backup-or-DR
For creating a simple AWS backup policy, see section 4.3. While a backup schedule is geared toward a production environment, it is optional, as you can run a policy independently of a schedule. To set a backup schedule, see section 4.2.
4.1 Adding an AWS Account
After logging on to the system for the first time, you will see the main screen, the Dashboard:
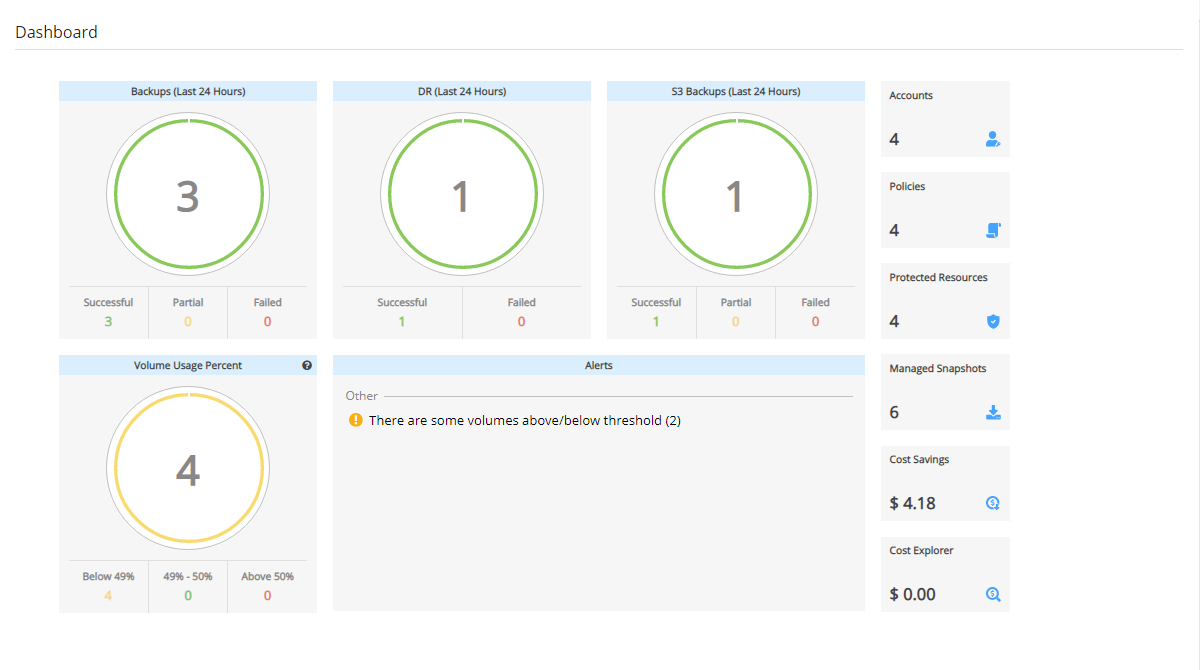
It is currently empty. The first thing you need to do is to associate an AWS account so you can start backing up EC2 instances. Depending on your edition of N2W, you can associate one or more AWS accounts.
To associate the AWS account with an N2W account:
In the left panel, select the Accounts tab, and in the + New menu, select AWS account.
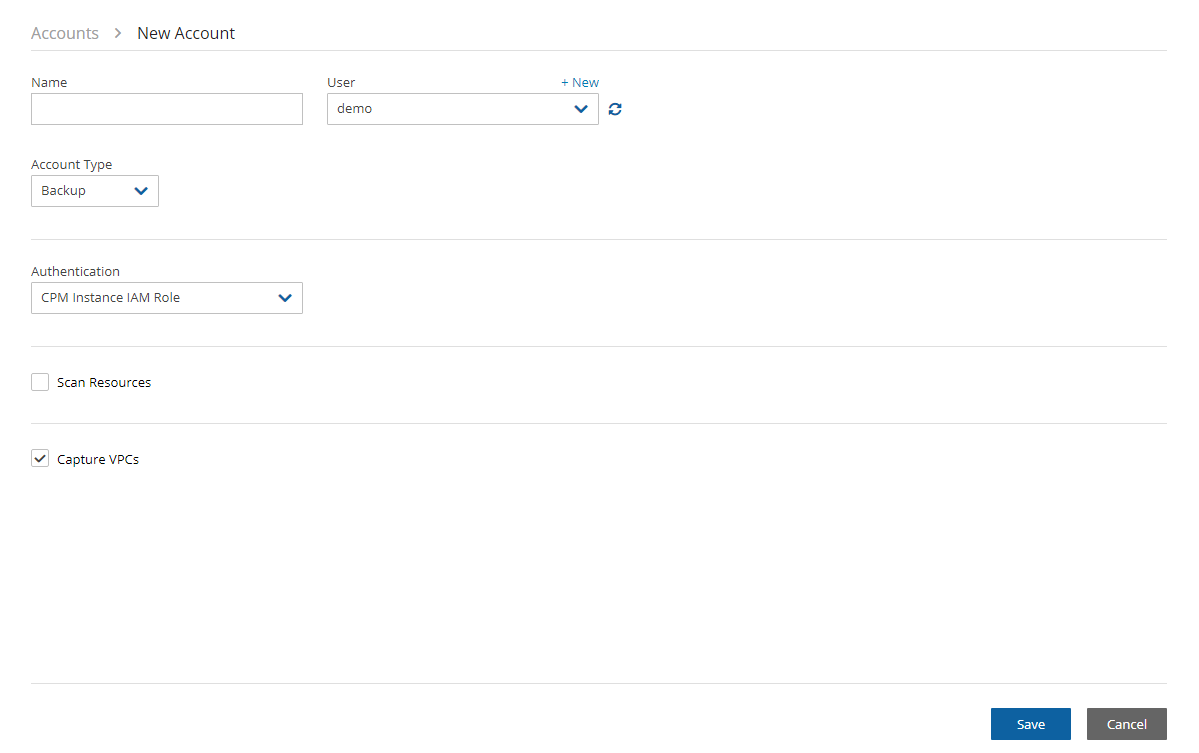
In the Name box, type the name you would like to associate with your primary AWS account.
In the Account Type list, select Backup. A DR account is for cross-account backup and recovery and is out of the scope of this guide. See "Account Type" in the N2W Backup & Recovery User Guide.
In the Authentication list, select your desired type of authentication. You can either choose to use your AWS access key and secret key or CPM Instance IAM Role, which is recommended. These credentials are saved in the N2W database. However, the secret key is kept in an encrypted form. There is no way these credentials will ever appear in a clear text format anywhere. See “Security Concerns and Best Practices” in the N2W Backup & Recovery User Guide.
Select Scan Resources to turn on the capability for this account to scan resources.
Select the Scan Regions and Resource Types in their respective lists.
Capture VPCs is enabled by default. Clear Capture VPCs to turn off automatic capturing of VPCs for this account.
Select Save.
4.2 Creating a Simple Backup Schedule
In the left panel, select the Schedules tab. Currently, the list of schedules is empty. You will now create the first schedule. Select + New.
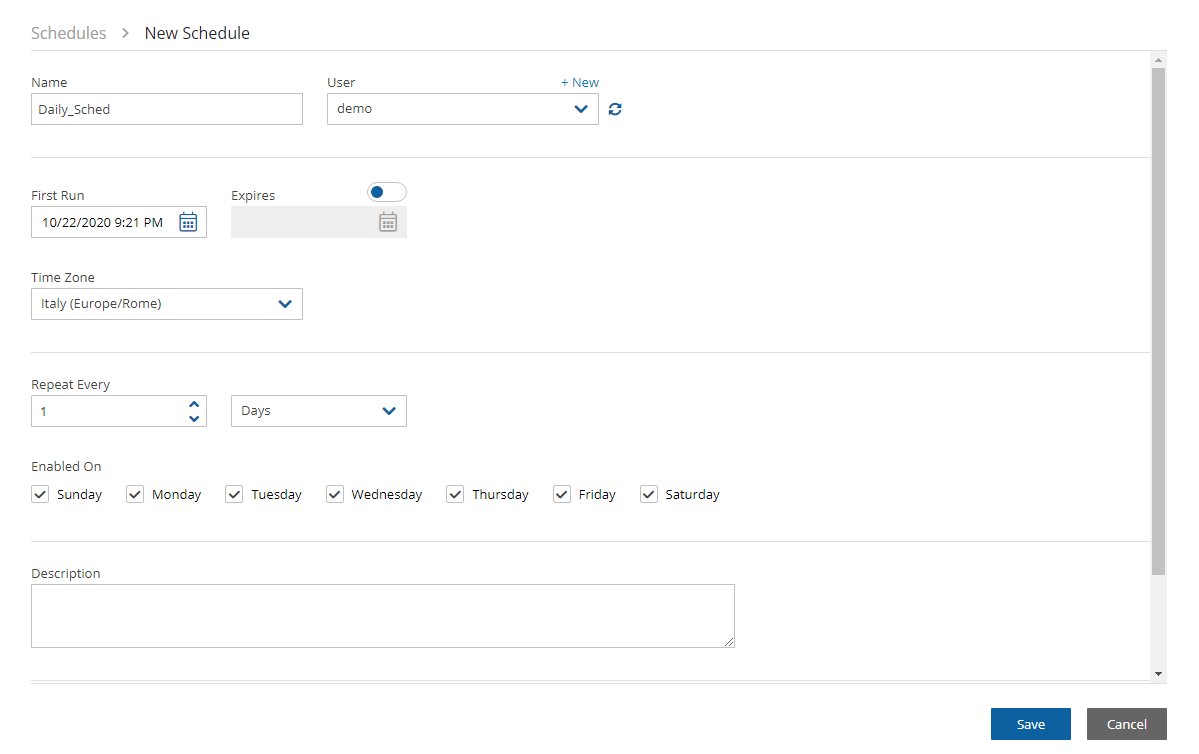
Type a name for the schedule and an optional description.
In the First Run box, if the First Run is other than immediately, select Calendar
 to choose the date and time to first run this schedule. The time set in First Run becomes the regular start time for the defined schedule. The default schedule expiration is never.
Set the schedule frequency in the Repeat Every list. Available units are minutes, hours, days, weeks, and months. Set the days of the week on which the schedule runs in the Enabled On checkboxes.
Select Save.
4.3 Creating a Simple Backup Policy
In the left panel, select the Policies tab. Currently, the list of policies is empty. You will now create the first policy. Select + New.
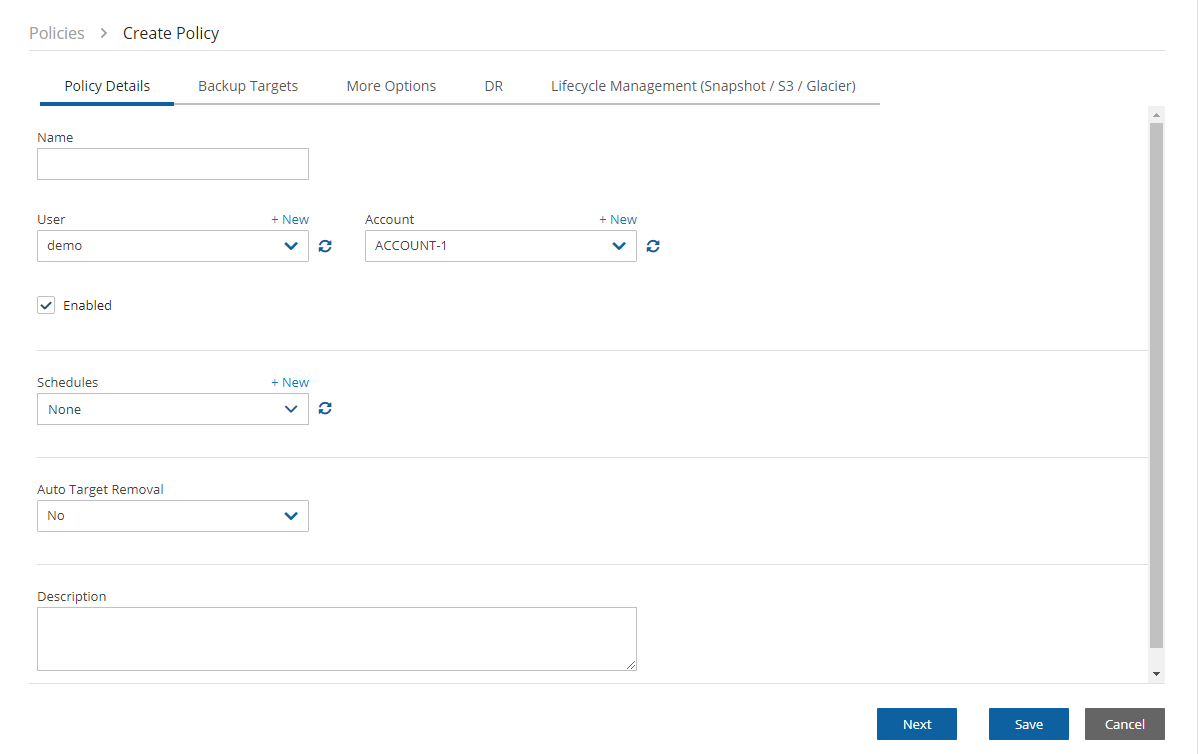
In the Create Policy page, enter a policy name and description. Other fields in this screen include:
Account – Each policy can be associated with one AWS account.
Auto Target Removal – Whether to auto-remove resources that no longer exist.
Enabled – By default, a policy is enabled.
Schedules – Select the schedule just created.
Auto Target Removal – Select from the list whether to automatically remove resources that no longer exist. If you enable this removal, if an instance is terminated, or an EBS volume deleted, the next backup will detect that and remove it from the policy. Choose yes and alert if you want the backup log to include a warning about such removal.
2. When finished, select Save and select the Backup Targets tab. Backup targets define what a policy is going to back up.
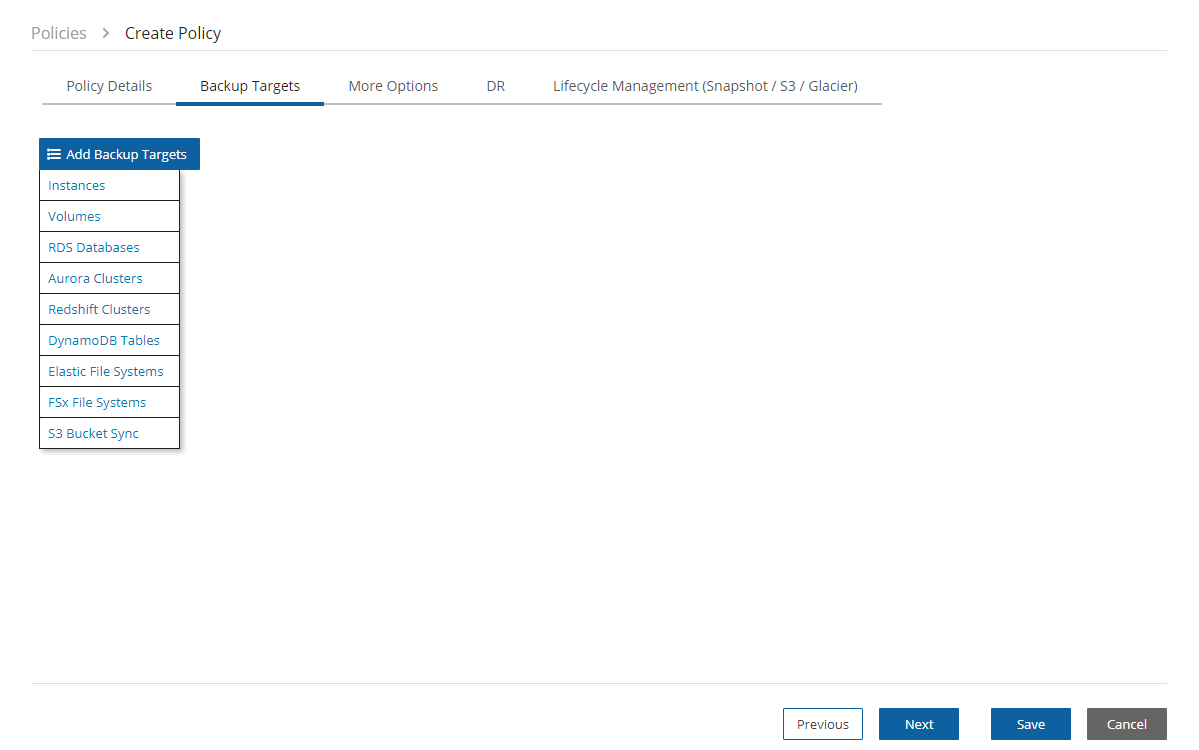
Following are the types of objects you can back up:
Instances - Back up EC2 instances, including their metadata, and optionally some or all of their data volumes. This is the most common backup target.
Volumes - Back up EBS volumes independently, whether or not they are attached to an instance, and regardless of which instance they are attached to. This can be useful to back up volumes that are not always attached to an instance, or volumes that move between instances, like cluster volumes.
RDS Databases - Back up RDS DB instances. This will use RDS snapshots and can be useful for backing up RDS databases together with other types of objects, or for anyone who wishes to backup RDS databases using N2W, in addition to or instead of using AWS automatic backup.
Aurora Clusters - Aurora is similar to RDS but handles Aurora clusters.
Redshift Clusters - Manage Redshift Cluster snapshots.
DynamoDB Tables - Back up DynamoDB Tables.
Elastic File Systems – Back up EFSs.
FSx File Systems - Back up FSx File Systems.
S3 Bucket Sync - Copy objects between S3 buckets.
To add an instance, for example, to the policy:
In the Add Backup Targets menu, select Instances. The list of instances you have in the region for the policy’s account appears. The Region list allows you to switch between different regions. You can use the free text search, column-based sorting, or pagination if there are a lot of instances and you are seeking a specific one.
Although you can add backup objects from different regions in the same policy, in many cases it is not a good practice to do so.
Select the instance that you want to back up and select Add Selected. This will add the requested instance to the screen in the background and remove it from the popup window, although it does not close the popup.
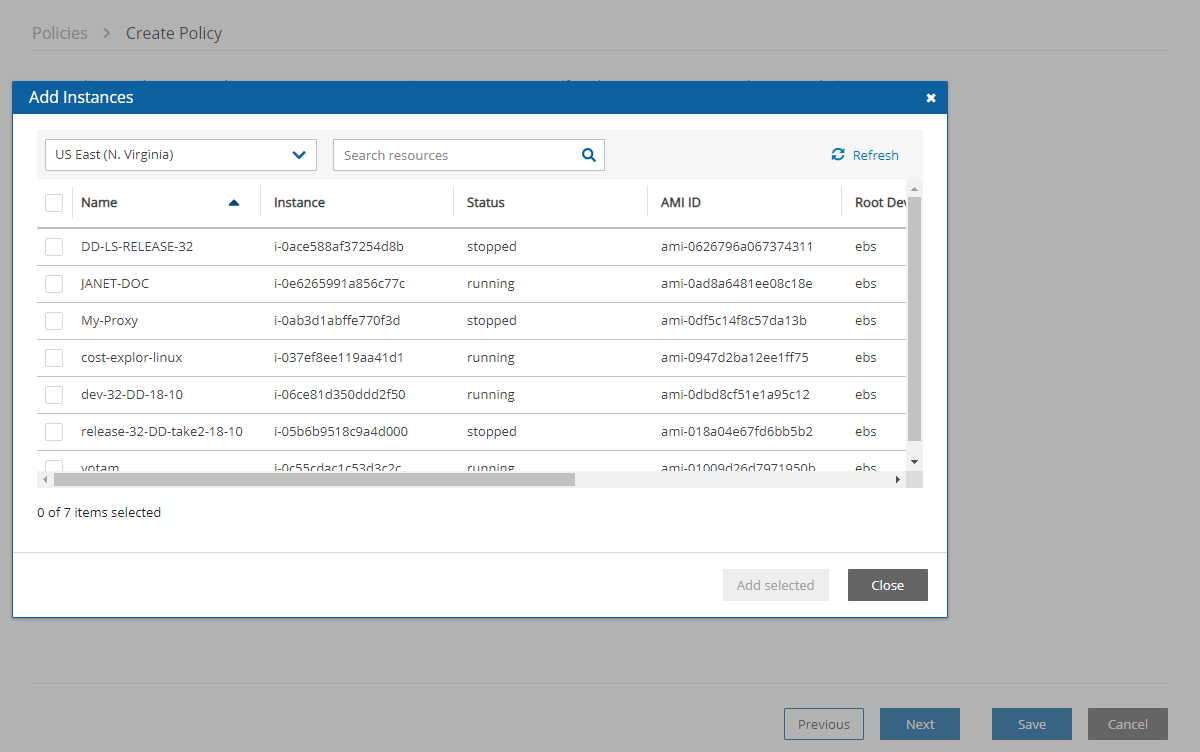
You can add as many instances as you want up to the limit of your license.
Select Close when finished.
Back in the Backup Targets screen, you can see the instance in the list of instances. You have an option to remove it from the policy and a Configure button. Select the instance and then select Configure to review which volumes to back up and other options.
By default, all EBS volumes which are attached to this instance will be backed up. If a volume gets detached from or attached to the instance, it will not interfere with the normal operations of the policy. In every backup, N2W will check which volumes are attached to the instance and take snapshots of them.
To view the planned backups for this policy, select Backup Times in the Policies list.
The backups will start automatically at the time configured previously in the schedule.
If you want to initiate an immediate backup, select a policy and then select Run ASAP.
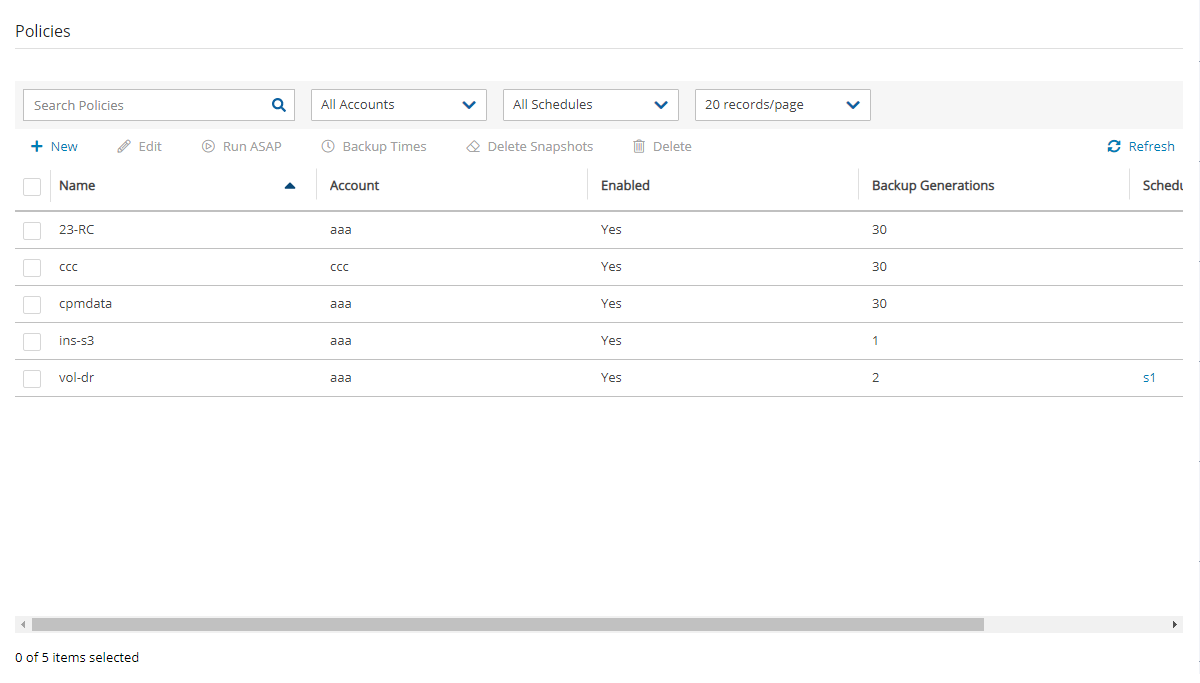
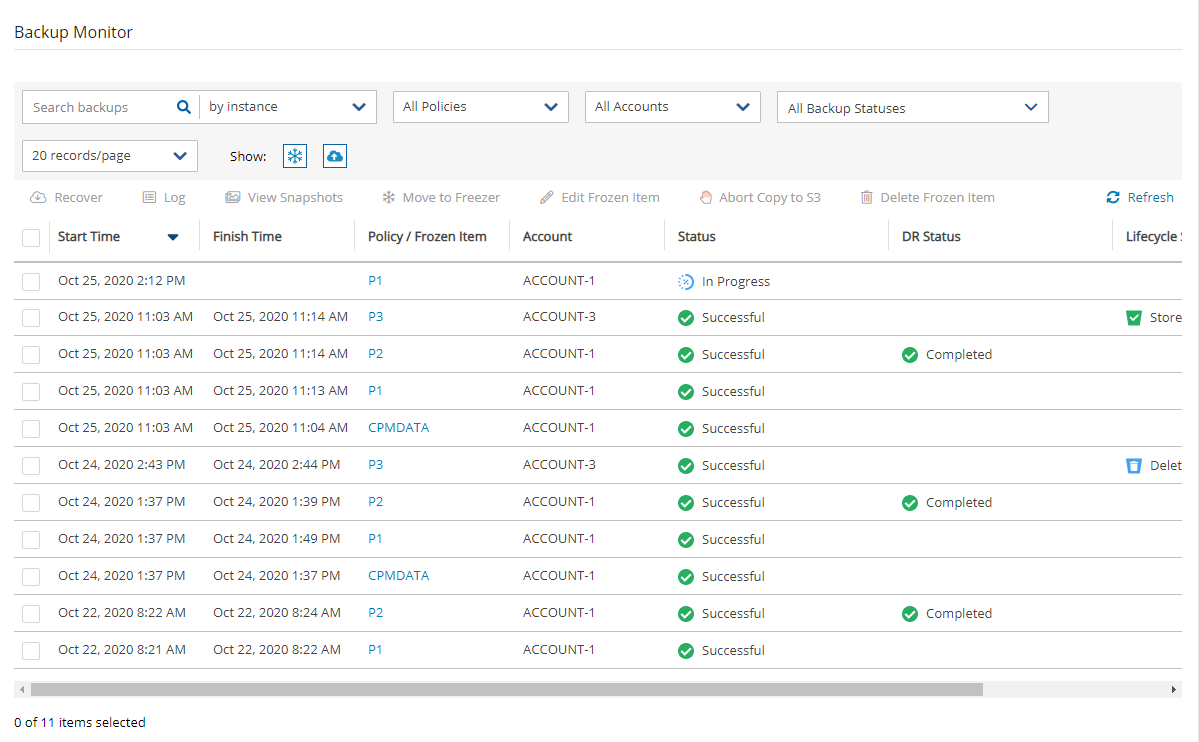
N2W will report that the backup policy will now run. The process can be monitored by following the Status in the Backup Monitor tab.
Check out the N2W Backup & Recovery User Guide to see how to create application consistency for Linux and Windows servers.
Last updated