5 Performing a Basic AWS Recovery with N2W
N2W backs up the requested objects at the requested times.
You can view the backups in the Backup Monitor tab. You can search for snapshots based on the Backup Target type, Policy, Account, and backup status.
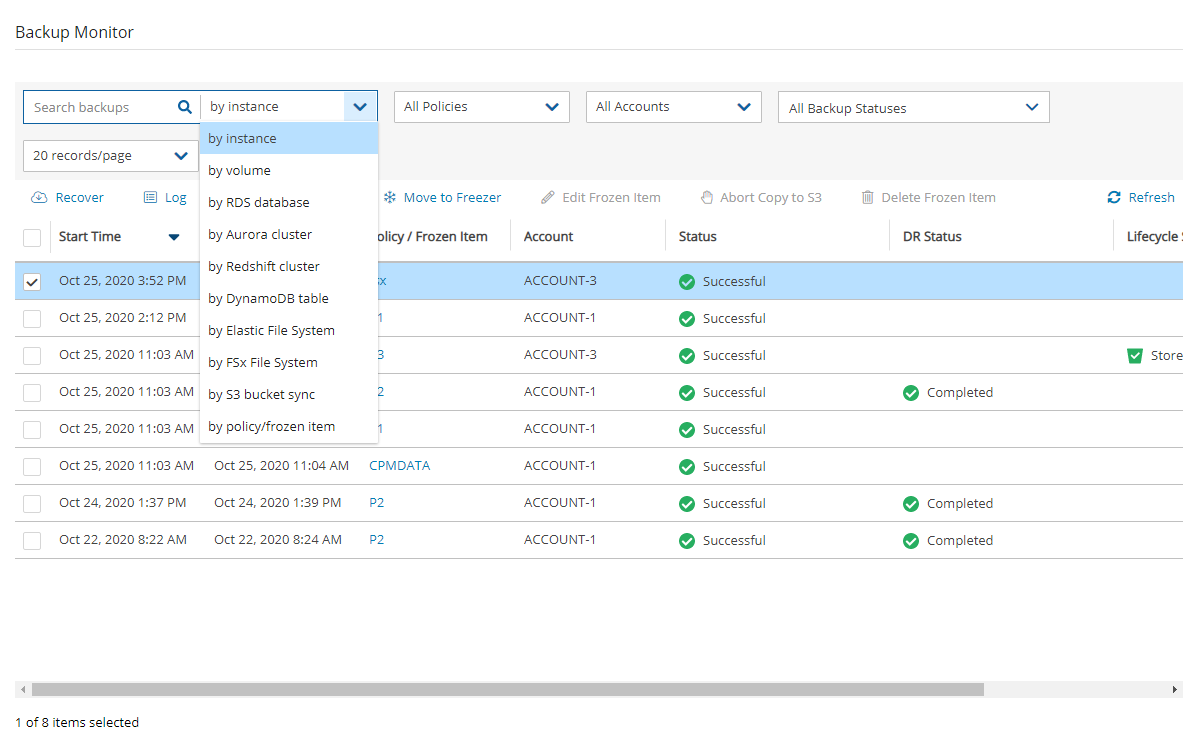
For each backup, you can see the exact start and finish times, and status. Select View Snapshots to see the individual EBS snapshots of all the volumes. Select Log to view the log of this backup with all the details. To recover from a particular backup (typically the most recent successful backup), select the backup and then select Recover:
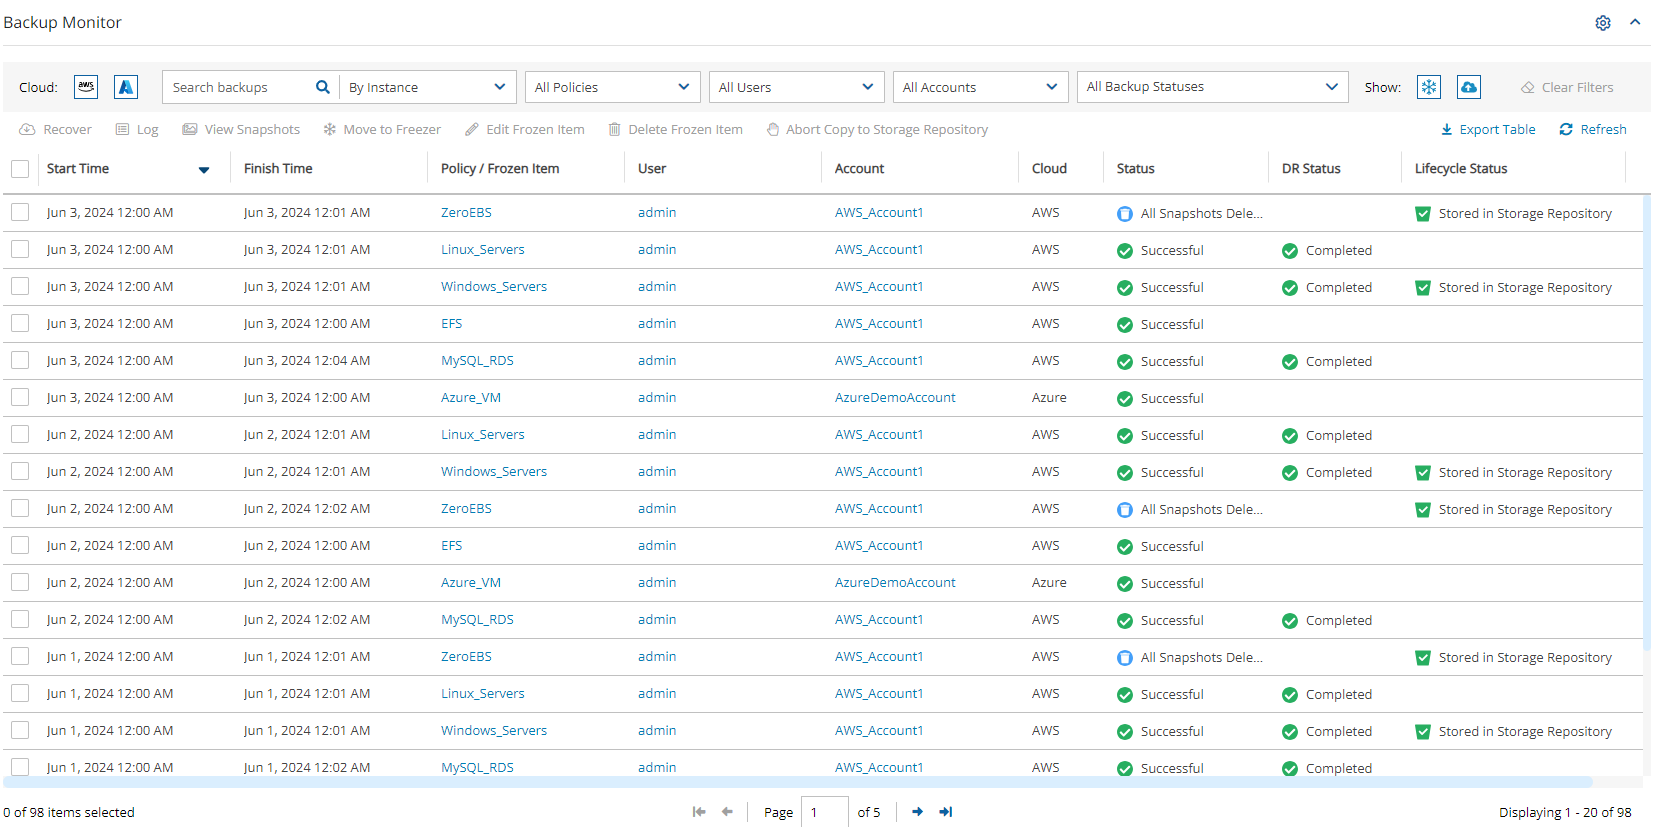
In the Recover screen, you can see all the instances that this backup contains. Should this policy include also EBS volumes, RDS databases, Redshift Clusters, or DynamoDB Tables, you will have a tab to recover them as well. In order to recover an instance, select the Instances tab.
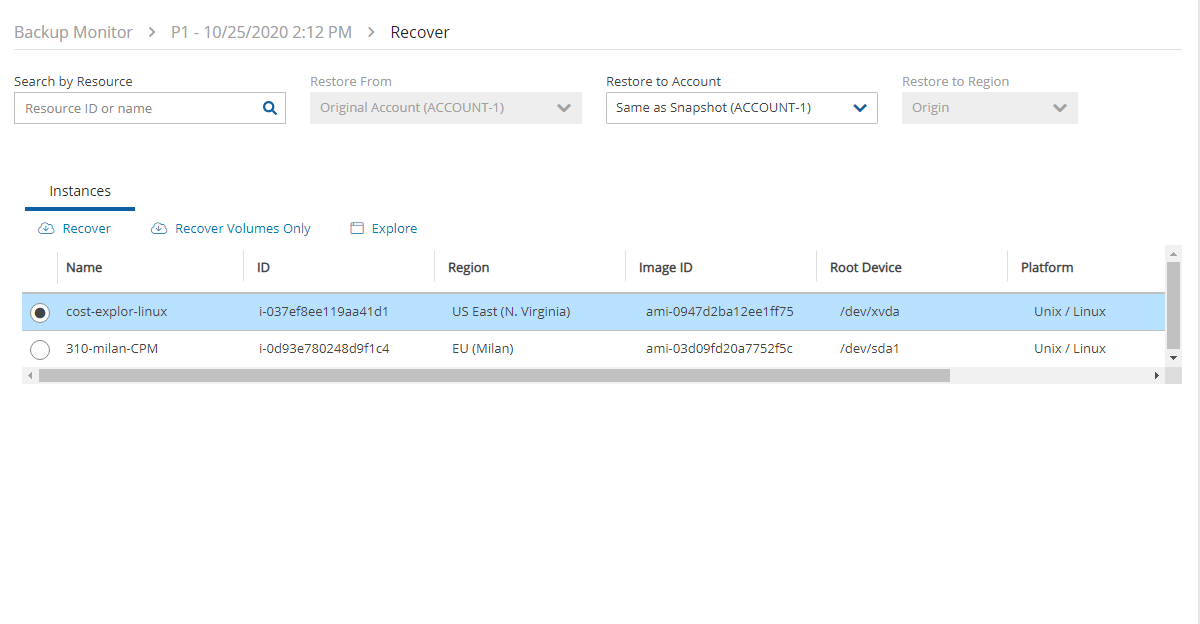
Recover Volumes Only is for recovering only the EBS volumes of the instance without actually creating a new instance.
Select the instance to recover and select Recover again. The Basic Options tab of the Instance Recovery page opens. You can enlarge the page by selecting the expand icon ![]() in the upper right corner.
in the upper right corner.
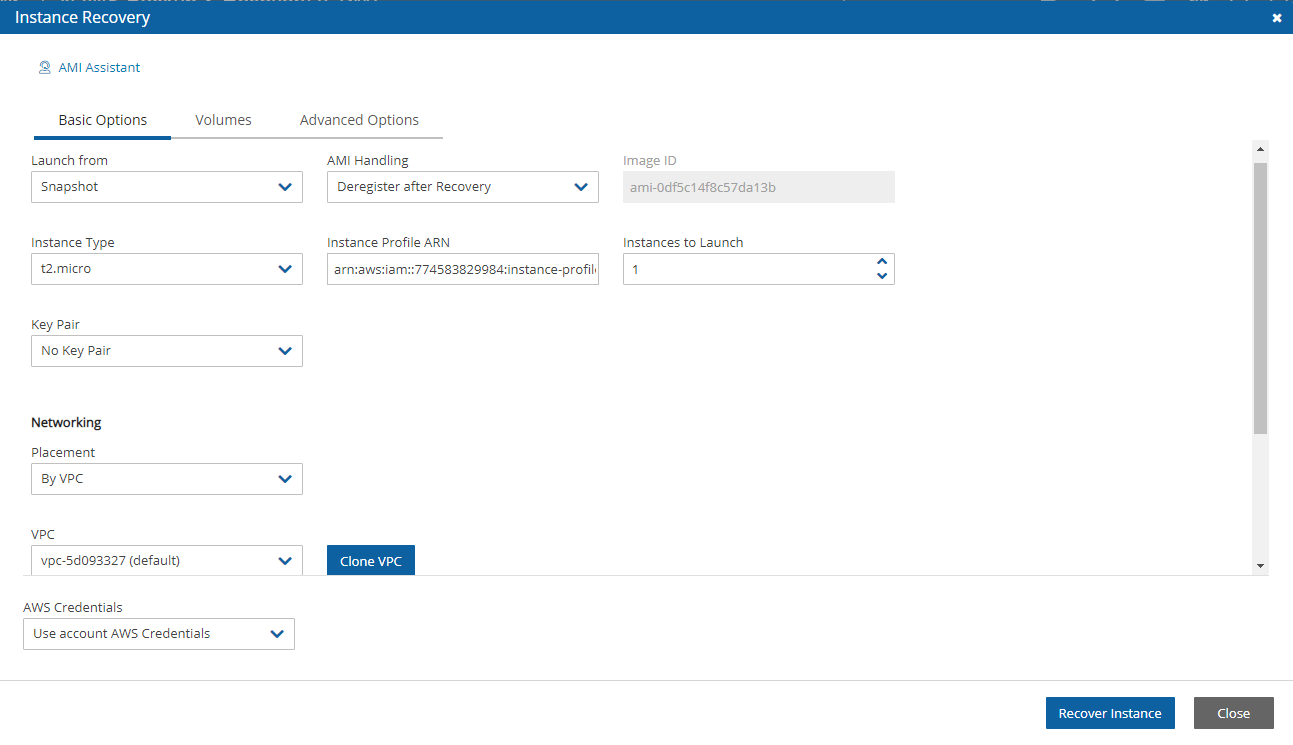
Most of the options when launching EC2 instances are available here and may be modified. The currently selected defaults are exactly the options the original backed-up instance had at the time of the backup, including the tags associated with it.
A further option worth mentioning here is Launch from. This sets the option for the image the new instance will be launched from.
In the case of an instance-store-based instance, the only option would be to launch from an image. The default will be the original image, although it can be changed. In case it is a Linux EBS-based instance, as in this example, and the backup includes the snapshot of the boot device, you can choose between launching from an image (the original image or another), and launching from the snapshot, which is the default.
If you choose to launch from a snapshot, a new image (AMI) will be created, and you can choose whether you want to keep the image after the recovery is complete or deregister it. You can even choose not to perform the recovery now, and only create the image, to recover from it later.
Select Recover Instance to recover an instance exactly like the original one.
For paid editions, if Capture VPCs was enabled in the Account settings, the Basic Options tab will also contain a Clone VPC button next to the VPC box.

The Clone VPC option allows you to recover the instance to a clone of a selected VPC environment. See https://docs.n2ws.com/user-guide/10-performing-recovery
If you intend to test the recovery of an instance in the same region as the originally backed up instance, you will need to change the IP to avoid an IP conflict. This can be mitigated by leaving the VPC Assign IP box blank
Select the Volumes tab to choose which volumes to recover and how.
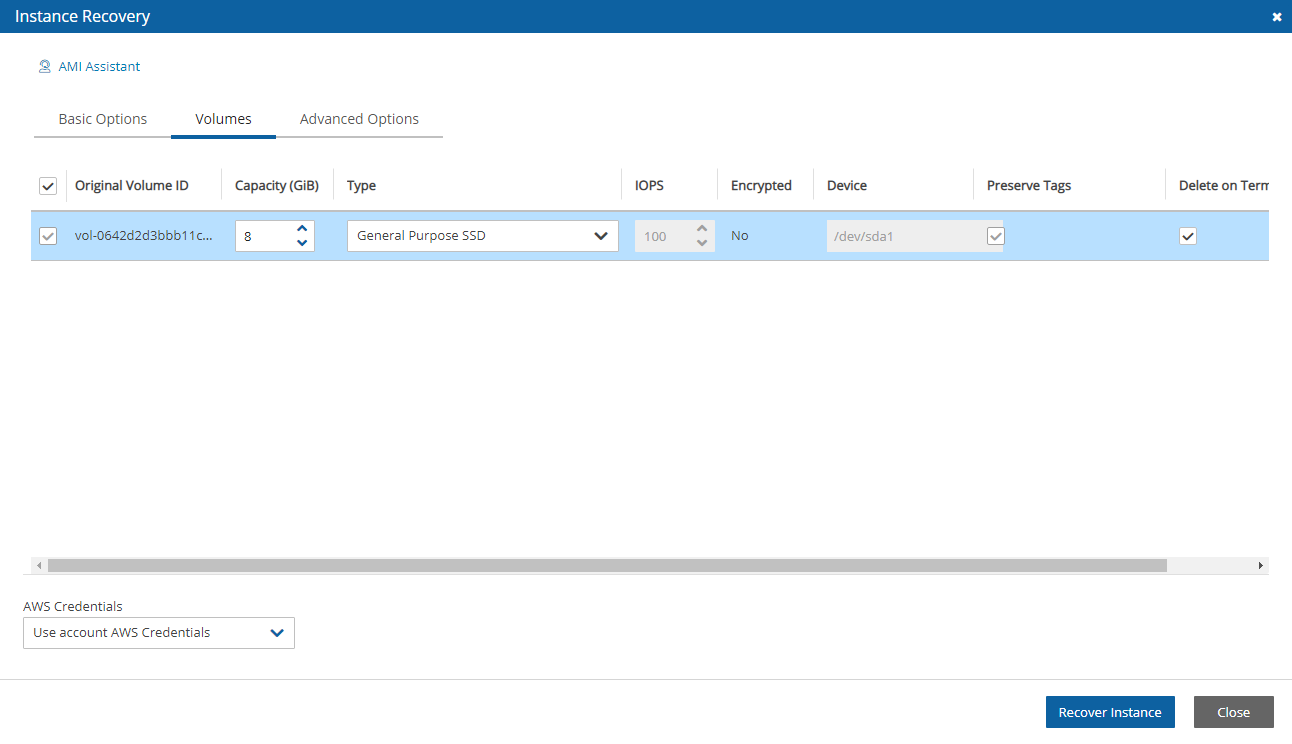
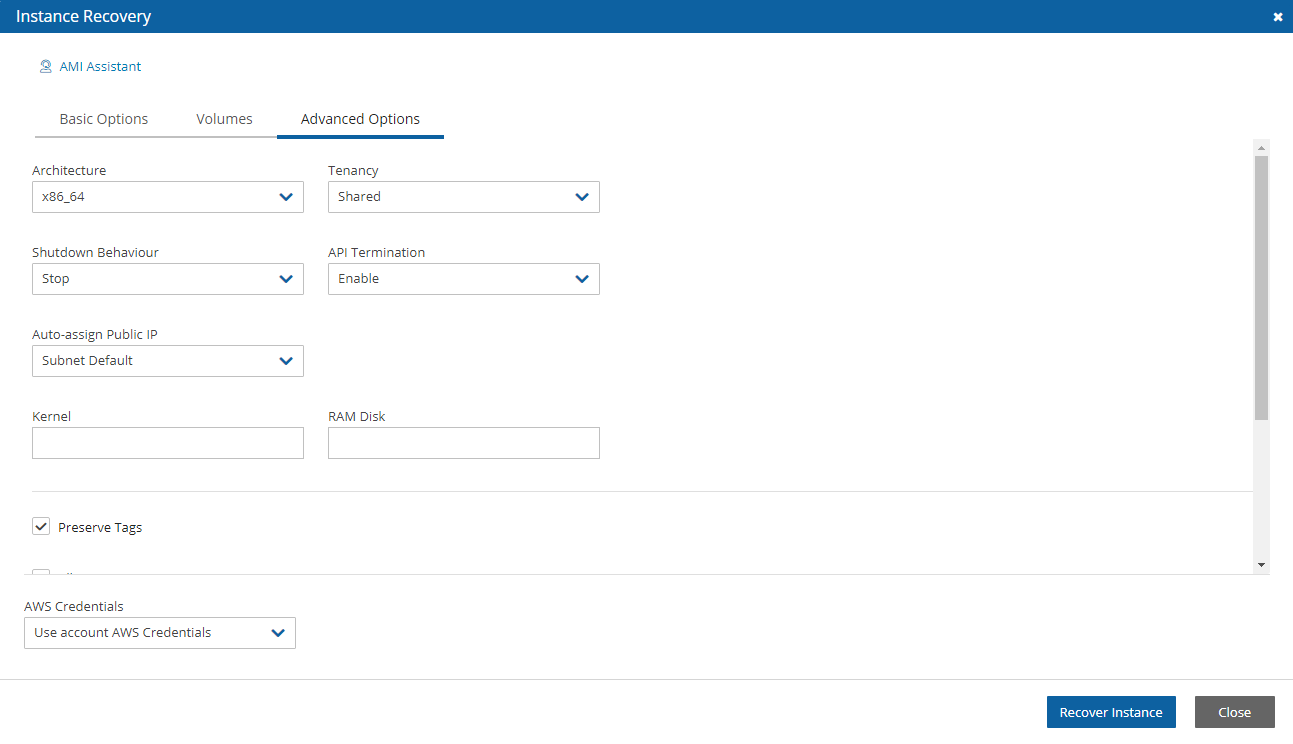
Select the Advanced Options tab for additional recovery parameters.
After you select Recover Instance and confirm, you will be directed to the Recovery Monitor page where you can follow the progress in the Status column. You can view recovery details by selecting Log.
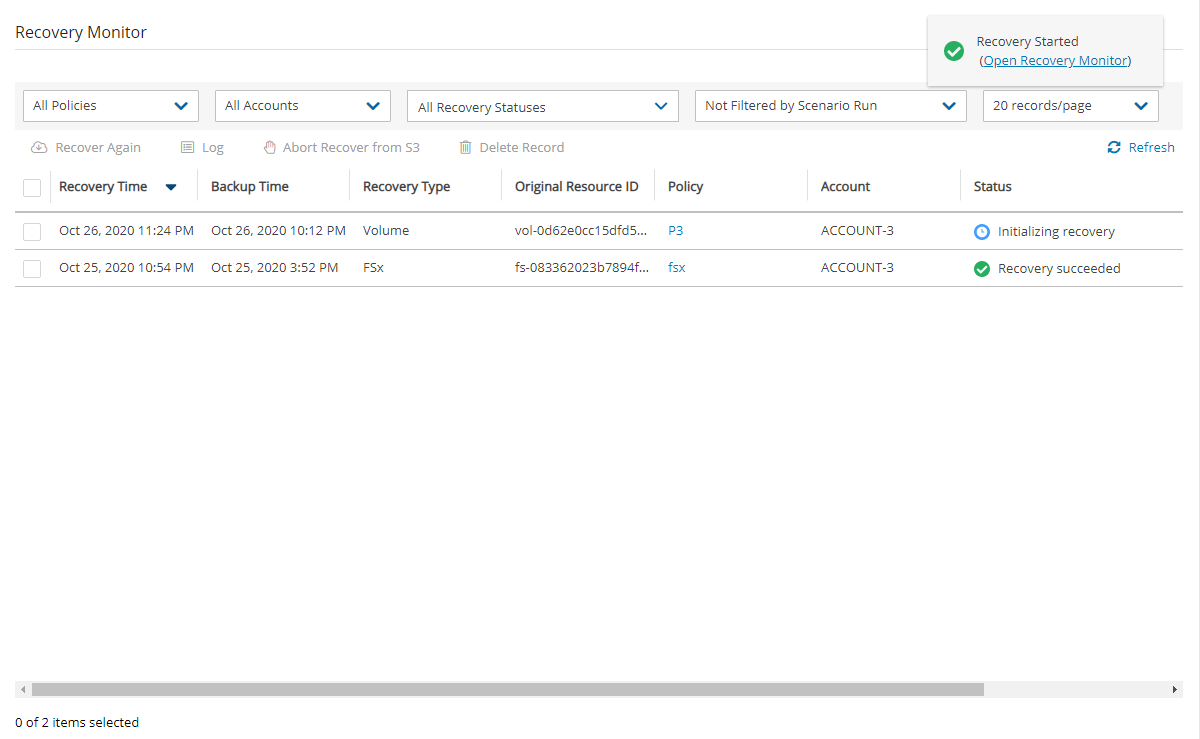
The log message will include the instance ID of the new instance, and now you can go and verify the successful recovery in the AWS Management Console. The recovered instance is exactly the same as the original one, with all its EBS volumes.
Last updated