13 File-Level Recovery
Here you will learn how to recover specific files and folders rather than an entire volume.
N2W supports file-level recovery. N2W performs a backup on the volume and instance level and specializes in the instant recovery of volumes and complete instances. However, in many cases, a user may want to access specific files and folders rather than recovering an entire volume.
N2W also provides the ability to locate the same item across a chain of consecutive snapshots during a single recovery session.
AWS allows item-level recovery for individual files from S3 and EFS. After reviewing this section, see the sections below for target-specific considerations.
In previous versions of N2W, you could recover a volume, attach it to an instance, mount it, and then access the data from within that instance. After completing the restore, assuming the volume is no longer needed, the user needed to unmount, detach, and delete the volume. N2W now automates this entire process.
To Explore the directory tree structure and select files or directories for recovery, the disk on the target backup must have an OS. If there is no OS on the disk, ![]() Explore will not work and a File Level Recovery Session will not open.
Explore will not work and a File Level Recovery Session will not open.
In the Backup Monitor, select a backup and then select ![]() Recover. In the Recover screen, select an instance or an independent volume, and then select
Recover. In the Recover screen, select an instance or an independent volume, and then select ![]() Explore Volumes. For an instance, you can also select
Explore Volumes. For an instance, you can also select ![]() Recover Volumes Only, select the required volume, and then select
Recover Volumes Only, select the required volume, and then select ![]() Explore Volumes.
Explore Volumes.
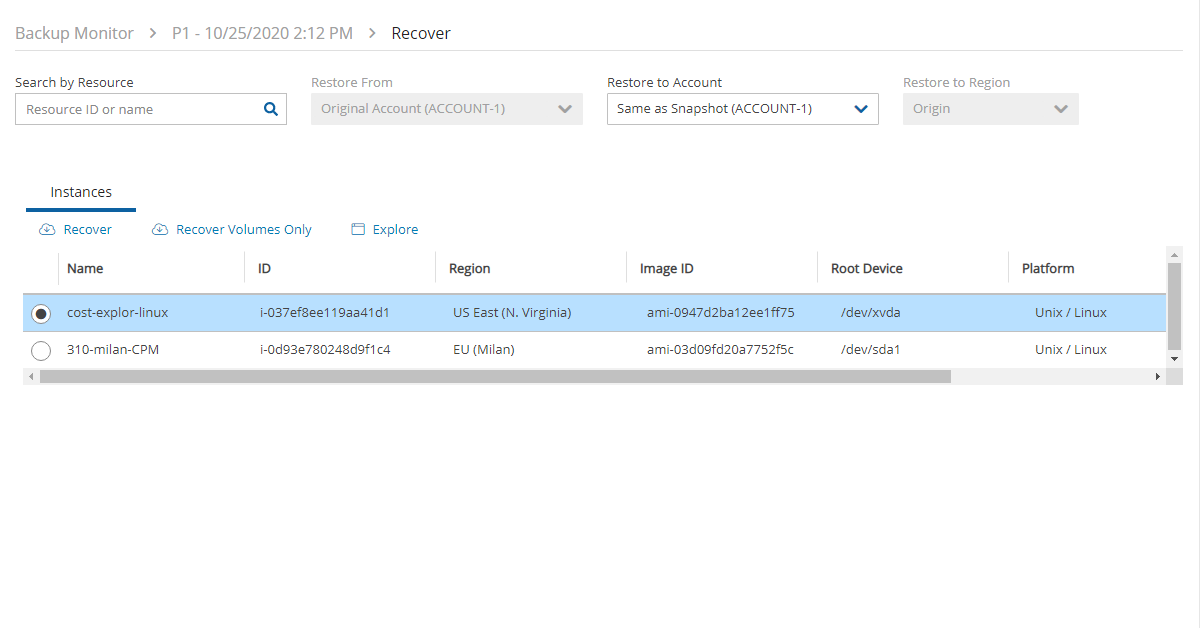
If there is more than 1 backup available to view, the File Level Recovery dialog opens showing the number of backups.
For Windows instances with dynamic disks partitioned using the master boot record (MBR) style, Explore only supports a single generation of snapshots. When more than 1 generation is selected for browsing, the dynamic disks will not be presented to the browser.
To view an instance across a chain of snapshots, select the number of backups to view.
To view the latest backup only, leave the value at the default of 1.
Select Start Session.

Only the number of available snapshots is presented, regardless of the number of generations.
There is a limit of 72 volumes in a File Level Recovery Session.
N2W will open the Initializing File Level Recovery message. 
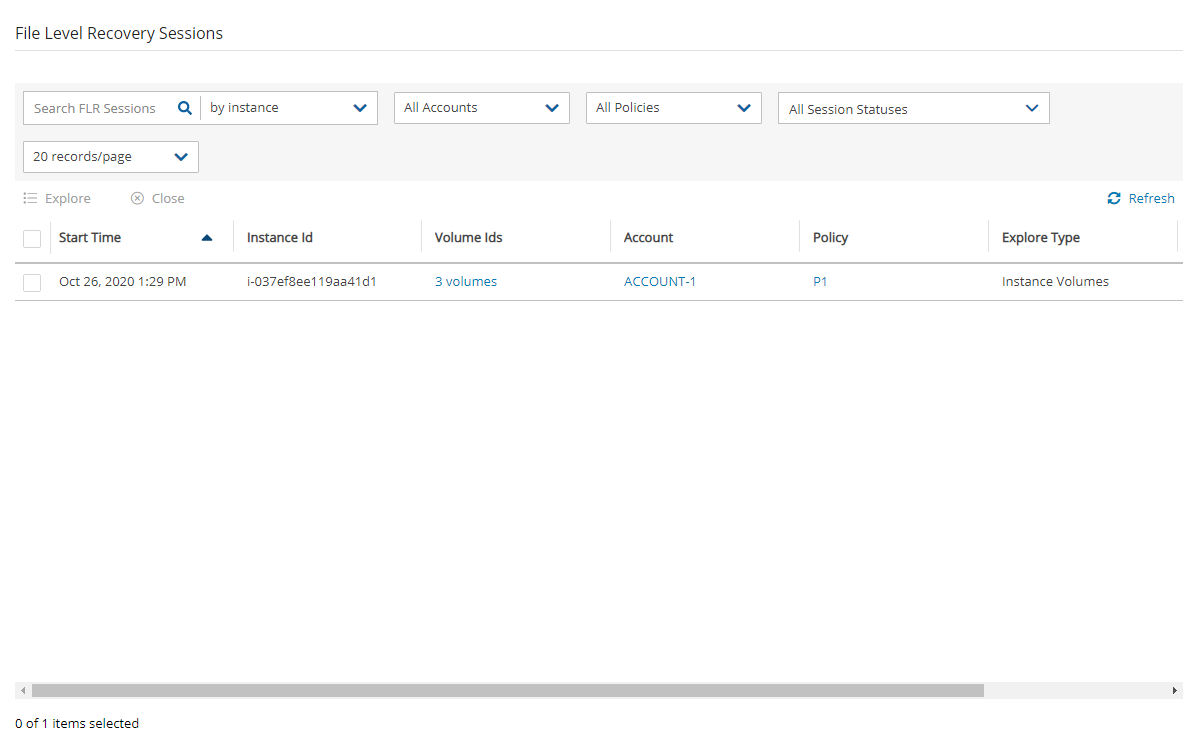
Select Open Session for an Explorer-like view of the entire instance or a specific volume, folder, or file. Loading the session may take a few minutes. If the Initializing File Level Recovery message closes before you can select Open Session, in the left pane, select the File Level Recovery Sessions tab, select the active session, and then select ![]() Explore.
Explore.
You will be able to browse, search for files, and download files and folders. Use the left and right arrows in the left corner to move between folders.
Files in an Explore volume may be soft links (symbolic links) to other files. Trying to access this type of file may result in an error. However, the file is accessible via its real path. For example, root/folder2/file2 is a soft link to root/folder1/file1, where /root/folder1/file1 is the real path.
Select any file or folder and then select ![]() Download. Folders are downloaded as uncompressed zip files.
Download. Folders are downloaded as uncompressed zip files.
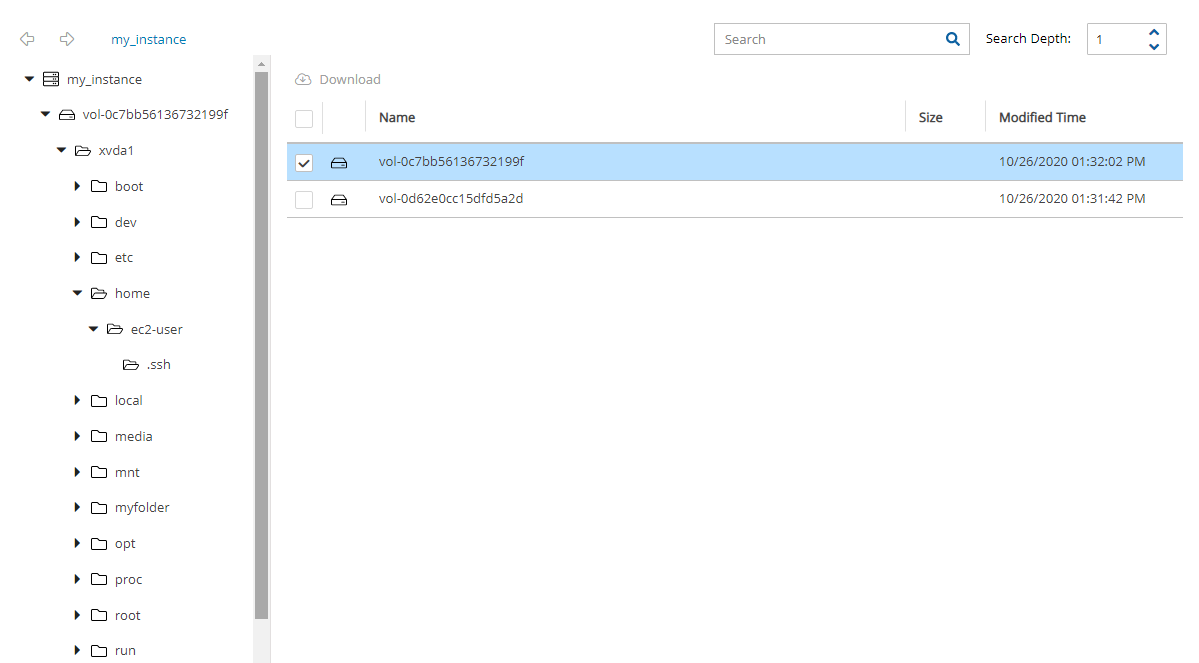
File-level recovery requires N2W to recover volumes in the background and attach them to a ‘worker’ launched for the operation. The worker will be launched in the same account and region as the snapshots being explored, using a pre-defined worker configuration. See section 22 to configure a ‘worker’ instance in the region that the snapshots exist.
The worker will communicate with the N2W server over both HTTPS and SSH. Verify that your configuration allows such communication.
After you complete the recovery operation, select Close for all the resources to be cleaned up and to save costs. Even if you just close the tab, N2W will detect the redundant resources and clean them up, but N2W recommends that you use Close. Sessions can be closed from the File Level Recovery Sessions tab also.
13.1 Limitations
There are a few limitations:
File-level recovery is supported only for file system types Ext2, Ext3, Ext4, NTFS, XFS, Btrfs.
If several XFS volumes have the same UUID, they cannot be mounted.
Explore works only on the supported file systems listed above. Attempting to Explore a volume of a non-supported file system will fail.
Explore works only on simple volumes and Logical Volume Management (LVM). LVM is supported with file-level restore on Linux, as well as for Windows dynamic disks. Additionally, disks defined with Microsoft Storage Spaces are not supported.
To Explore snapshots taken in a different region than where the N2W server is, it is required to configure a ‘worker’ instance in the region that the snapshots exist. See section 22.
File-level recovery from an AMI only backup is not supported.
N2W does not support Windows Data Deduplication.
13.2 File Level Recovery from Snapshots in a Storage Repository
In the Backup Monitor, select a backup Stored in Storage repository, and then select
 Recover. The Recover screen opens.
In the Recover From drop-down list, select Storage Repository. If the original EBS snapshots of the selected backup were already deleted, Storage Repository will be the only option, and the drop-down list will be disabled.
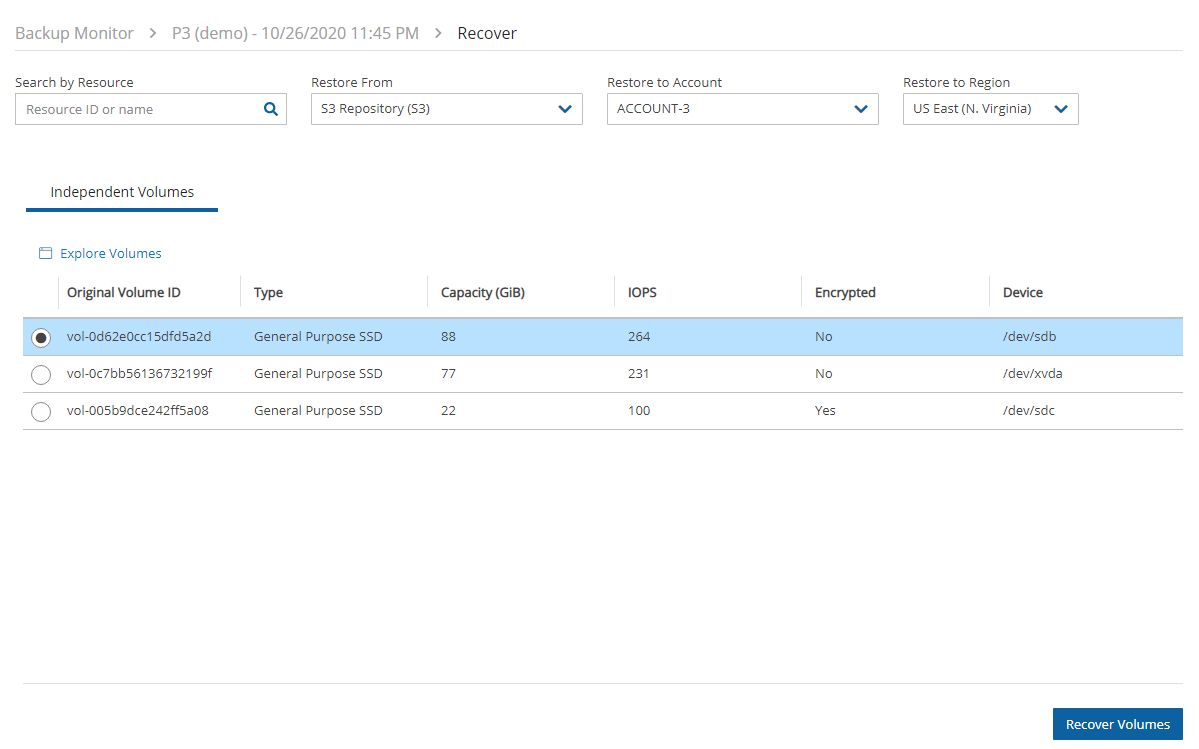
In the Recover screen, select an instance or an independent volume, and then select
 Explore Volumes. For an instance, you can also select
  Recover Volumes Only. Select the required volume, and then select
  Explore Volumes.
In the Initializing File Level Recovery message, select Open Session.
 Loading the session may take a few seconds. If the Initializing File Level Recovery message closes before you can select Open Session, in the left pane, select the File Level Recovery Sessions tab, select the active session, and then select
  Explore.
In the File Level Recovery Session window, navigate to the desired folder. See section 13.
Select the folders or snapshots to recover and select
 Download.
To close an active session, in the File Level Recovery Sessions tab, select the active session and then select
 Close.
13.3 File-Level Recovery from EFS
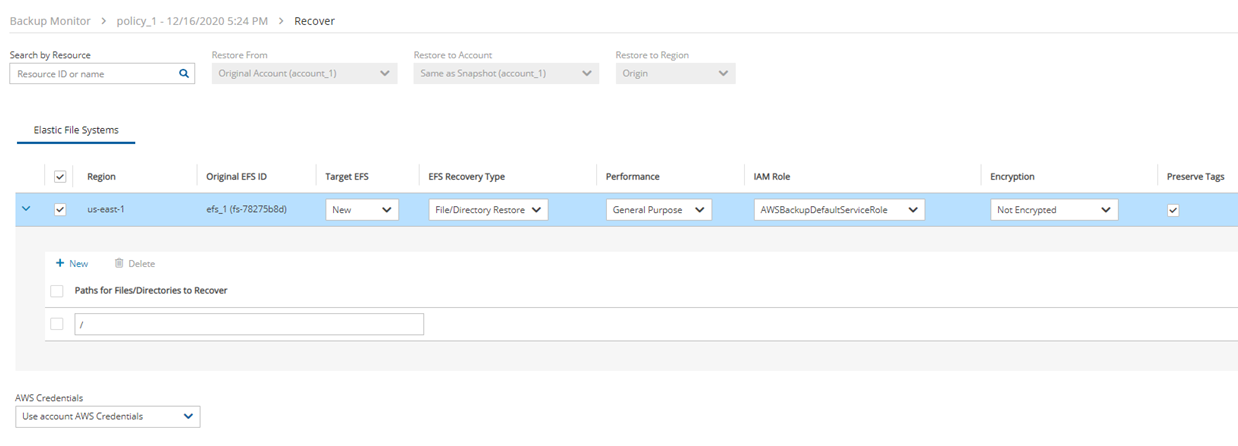
You can restore up to 5 items in your EFS to the directory in the source file system.
To restore EFS at the item level:
In the Backup Monitor, select a snapshot, and then select
 Recover.
In the EFS Restore Type column, select File/Directory Restore.
The default Preserve Tags action during recovery is Preserve Original for the volumes associated with the virtual machine. To manage tags, see section 10.3.
At the left, select the right arrow (>) to open the item recovery path input box.
In the Paths for Files/Directories to Recover box, enter a forward slash (/) and the name of the path. See further limitations on the pathname in the Warning box below.
Select
 New to add up to 5 recovery paths.
When defining a recovery path:
AWS Backup restores a specific file or directory. You must specify the path relative to the mount point. For example, if the file system is mounted to
/user/home/myname/efsand the file path isuser/home/myname/efs/file1, enter/file1.A forward slash (/) is required at the beginning of the path.
Paths should be unique. If not, the 'This path already exists' error message will appear.
Paths are case sensitive.
Wildcards and regex strings are not supported.
13.4 File-Level Recovery from S3 Bucket
You can restore up to 5 items in your S3 Bucket to the directory in the source file system.
To restore S3 Bucket at the item level:
In the Backup Monitor, select a snapshot, and then select
 Recover.
In the Basic Options tab, in Restore Type, select Item level restore.
Complete Versions to Restore, Restore Destination, and Restore Access Control Lists.
Select
 New to add up to 5 recovery paths. In the Paths for Files/Directories to Recover box, enter a forward slash (/) and the name of the path. See further limitations on the pathname in the EFS Warning box above.
Select the Tag Options tab to manage any tags. The default Preserve Tags action during recovery is Preserve Original. To manage tags, see section 10.3.

Last updated
Was this helpful?

