25 Monitoring Costs and Savings
This section describes how to monitor and manage N2W costs.
N2W Software customers have a single point of control and management over the procedure of backing up their cloud-based services and data stores. Monitoring the costs will help customers define backup plans that fit their budget and thereby avoid unexpected costs. N2W provides the following services for monitoring costs:
Cost Explorer – Cost of storage that was created by N2W to hold short-term backup snapshots of the customer’s cloud-based assets.
Allows customers to monitor the costs by the backup processes generated by N2W.
Allows customers to issue monthly bills per policy backups.
Calculations are made for the last month by default and can be set to prior periods.
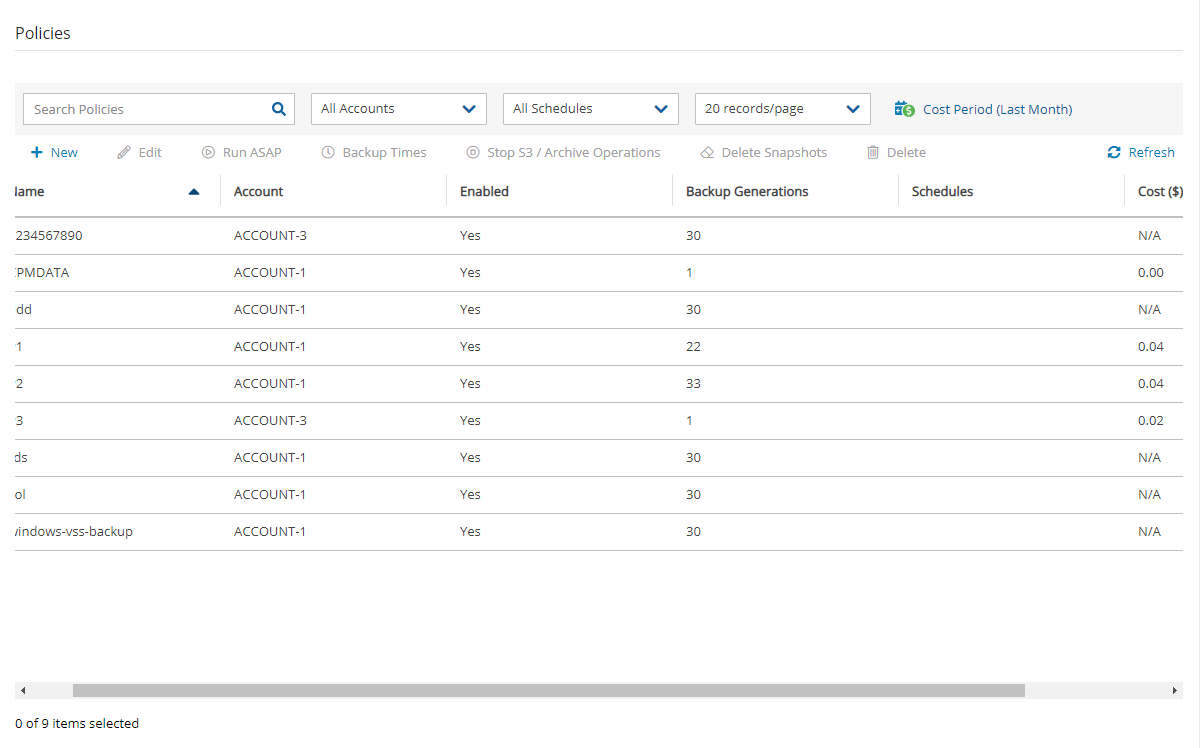
Breakdown of costs is found in the Costs ($) column of the Policies tab.
Cost Savings – Amount of money that users can save by enabling Resource Control management.
Calculations are made for the next month.
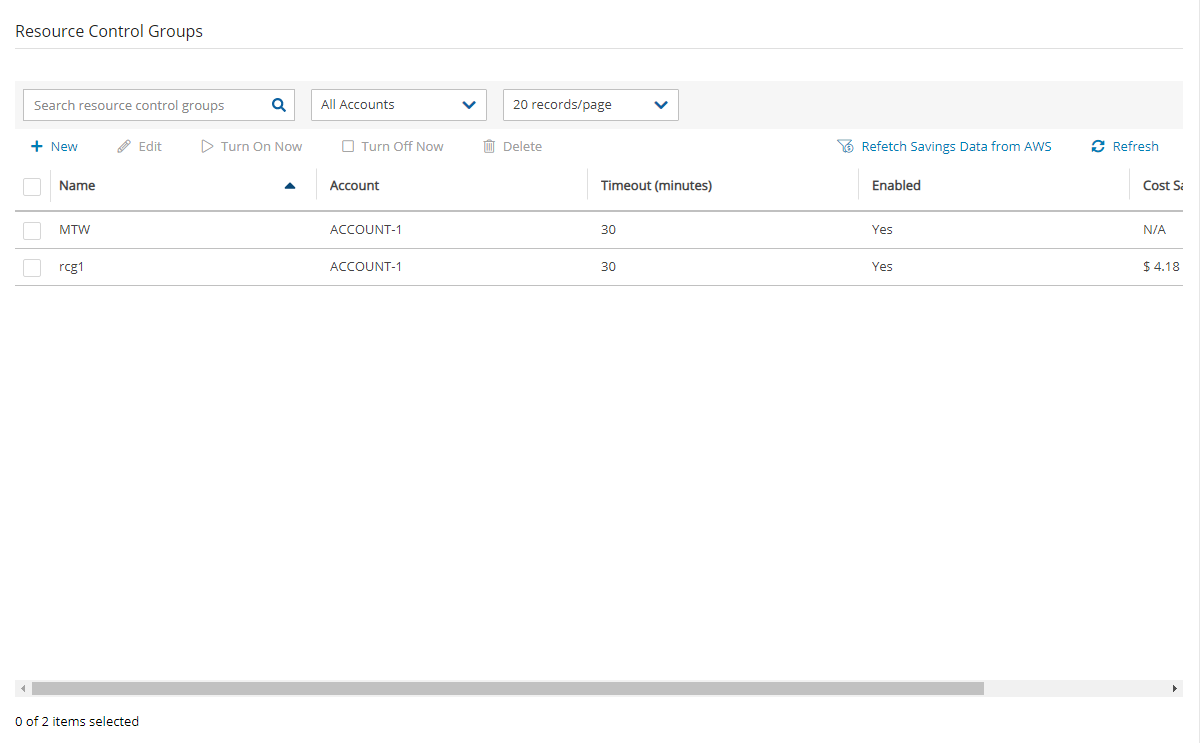
Breakdown of savings is found in the Cost Savings column of the Resource Control Groups tab.
Cost Explorer support is currently limited to the AWS resource EBS.
N2W uses the AWS REST API for retrieving costs for the specified policy. The Cost Explorer API allows us to programmatically query your data usage and compute the cost and usage data. It can take up to 48 hours for the cost increase to take effect.
The costs will include both short-term and long-term backups (cross-region DR), but not snapshots that were copied onto cheaper media such as S3 and Glacier.
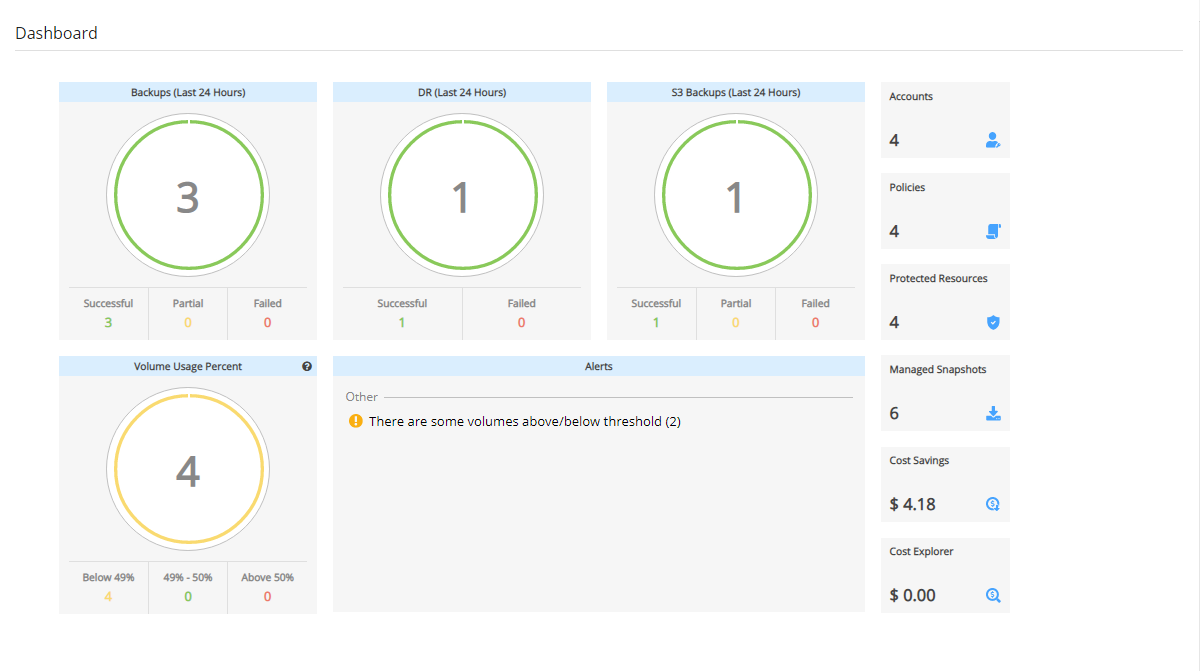
In the Dashboard screen, you can find both Cost Explorer and Cost Savings information in their respective tiles:

25.1 Enabling and Disabling Cost Explorer
Cost Explorer is not available currently in AWS GovCloud (US).
Following are the steps necessary for using Cost Explorer:
In AWS, activate cost allocation tags. See section 25.1.1.
In N2W:
For CPM, select Enable Cost Explorer in the Cost Explorer tab of General Settings.
For each designated user, enable Allow Cost Explorer. See section 18.3.
To disable Cost Explorer, it is sufficient to clear Enable Cost Explorer in the Cost Explorer tab.
25.1.1 Configuring AWS to Allow CPM Cost Explorer Calculations
To allow CPM Cost Explorer calculations in AWS, users must add cost allocation tags once.
To activate user cost allocation tags:
Log in to the AWS Management Console at https://console.aws.amazon.com/billing/home#/.
Open the Billing and Cost Management console.
In the navigation pane, choose Cost Allocation Tags.
Choose the following tags to activate, and then select Activate:
cpm_server_idcpm_policy_name
It can take up to 24 hours for tags to activate.
For complete details, see http://docs.aws.amazon.com/awsaccountbilling/latest/aboutv2/activating-tags.html
25.2 Monitoring Costs
In the Policies tab, you can monitor the backup costs of each policy for the last month or a different time period. The breakdown of costs per policy in dollars for the desired period appears in the Cost ($) column.
Cost Explorer inclusions and exclusions:
The cost figure includes all policies that were ever backed up by N2W and does not filter out deleted policies. The costs for policies deleted during a cost period are still included in the cost figure for that period.
N2W Cost Explorer does not include the cost of cross-account DR snapshots.

If the Allow Cost Explorer option is not enabled for the logged-in user, or if the backup was generated within the last 24 hours, the Cost ($) column will show ‘N/A’. To enable Cost Explorer for a user, see section 18.3.
25.2.1 Specifying a Different Time Period for Cost Calculations
You can monitor costs for a different time period by setting the Cost Period for all policies. The maximum period is one year. The current period is shown next to ![]() Cost Period in the Policies tab below the filters.
Cost Period in the Policies tab below the filters.
To specify the period for cost calculations:
Select the Policies tab and then select
 Cost Period.
Select Period.
Choose the From and To dates from the calendars, selecting Apply after each date.

25.3 Monitoring Expected Cost Savings
In the Resource Control Groups tab, you can monitor the expected Cost Savings for each group, based on the schedules you have set to Turn Off an instance or an RDS database.
When the Operation Mode of a Resource Control Group is Turn Off Only, N2W will show ‘No-Data’ in the Cost Savings column.
Cost Savings currently is not supported in GovCloud regions.

To update the screen with the current AWS savings, select ![]() Refetch Savings Data from AWS, and then select View updated data in the data refetched message.
Refetch Savings Data from AWS, and then select View updated data in the data refetched message. 
Was this helpful?

