# 27 Using Wasabi Storage
Wasabi Storage is an independent third-party provider of storage account services. Wasabi storage is compatible with Amazon S3 object storage and is available for use through N2W. Storing snapshots with Wasabi instead of S3 allows customers to save on their long-term storage costs.
{% hint style="info" %}
Because Wasabi is an external cloud storage provider, customers should be aware that Data Transfer charges to the Internet will be applied by their cloud provider for data sent to Wasabi.
{% endhint %}
A Wasabi repository is based on a bucket in the Wasabi system. Wasabi repositories can be used to store snapshots for both AWS and Azure policies. You can cross-cloud backups by going from N2W on AWS to Wasabi or from N2W on Azure to Wasabi.
{% hint style="warning" %}
* Make sure that your license supports Wasabi.
* Enable **Wasabi Cloud** as one of your UI defaults in N2W **Server Settings > General Settings > User UI Default**.
* **Compliance-only** Immutable backups are supported for Wasabi repositories.
* Wasabi Repository buckets may *not* be versioned.
* *Don't* rename a Wasabi bucket after selection as a repository as the copy will fail.
{% endhint %}
## 27.1 Adding a Wasabi Account to N2W
Authentication to Wasabi using user-specified credentials is required first for N2W to access a Wasabi bucket.
{% hint style="info" %}
Authentication of Wasabi accounts is by **Access Key ID** and **Secret Access Key** *only*.
{% endhint %}
* Create a Wasabi account in N2W with the required credentials.
* Create a Wasabi repository in any bucket accessible to the specified account. See section [27.2](#id-27.2-the-wasabi-repository).
**To create a Wasabi account**:
1. Log on to N2W using the root username and password used during the N2W configuration.
2. Select the **Accounts** tab.
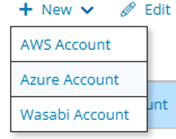
3. In the  **New** menu, select **Wasabi Account**..
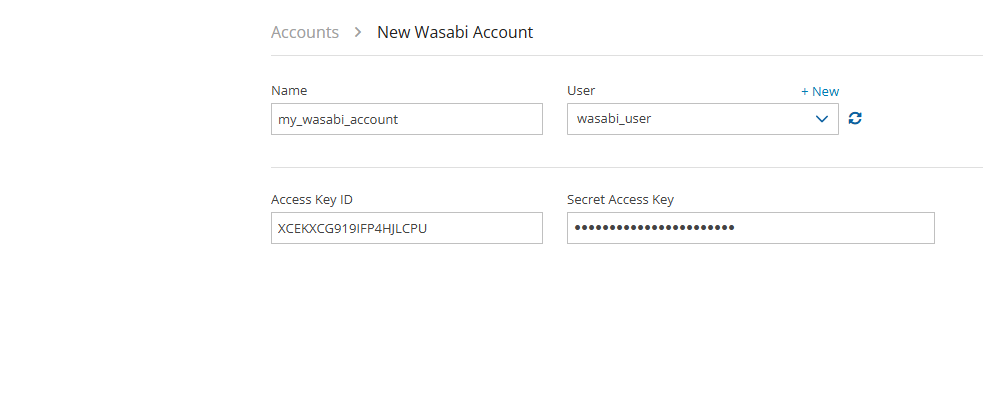
4. Complete the New Account screen using the App registration view information.
1. **Name** – Name for this N2W account.
2. **User** – The N2W user that this account belongs to. See section [18](https://docs.n2ws.com/user-guide/18-user-management).
3. **Access Key ID** - ID provided by N2W for authentication.
4. **Secret Access Key** - Key provided by N2W for authentication.
## 27.2 The Wasabi Repository
Wasabi repositories are where backups of SQL servers are stored. Wasabi repositories can also be used to store disk snapshots via a Lifecycle policy or serve as cross-cloud storage for AWS volume snapshots via a Lifecycle policy. For further details, see section [21.](https://docs.n2ws.com/user-guide/21-managing-snapshots-with-lifecycle-policies)
{% hint style="warning" %}
* A single Wasabi container can have multiple repositories.
* Wasabi buckets may *not* be versioned.
* A Wasabi bucket *cannot* be renamed after using it as a repository as the copy will fail.
{% endhint %}
### 27.2.1 Configuring a Wasabi Repository
#### To configure a Wasabi Repository:
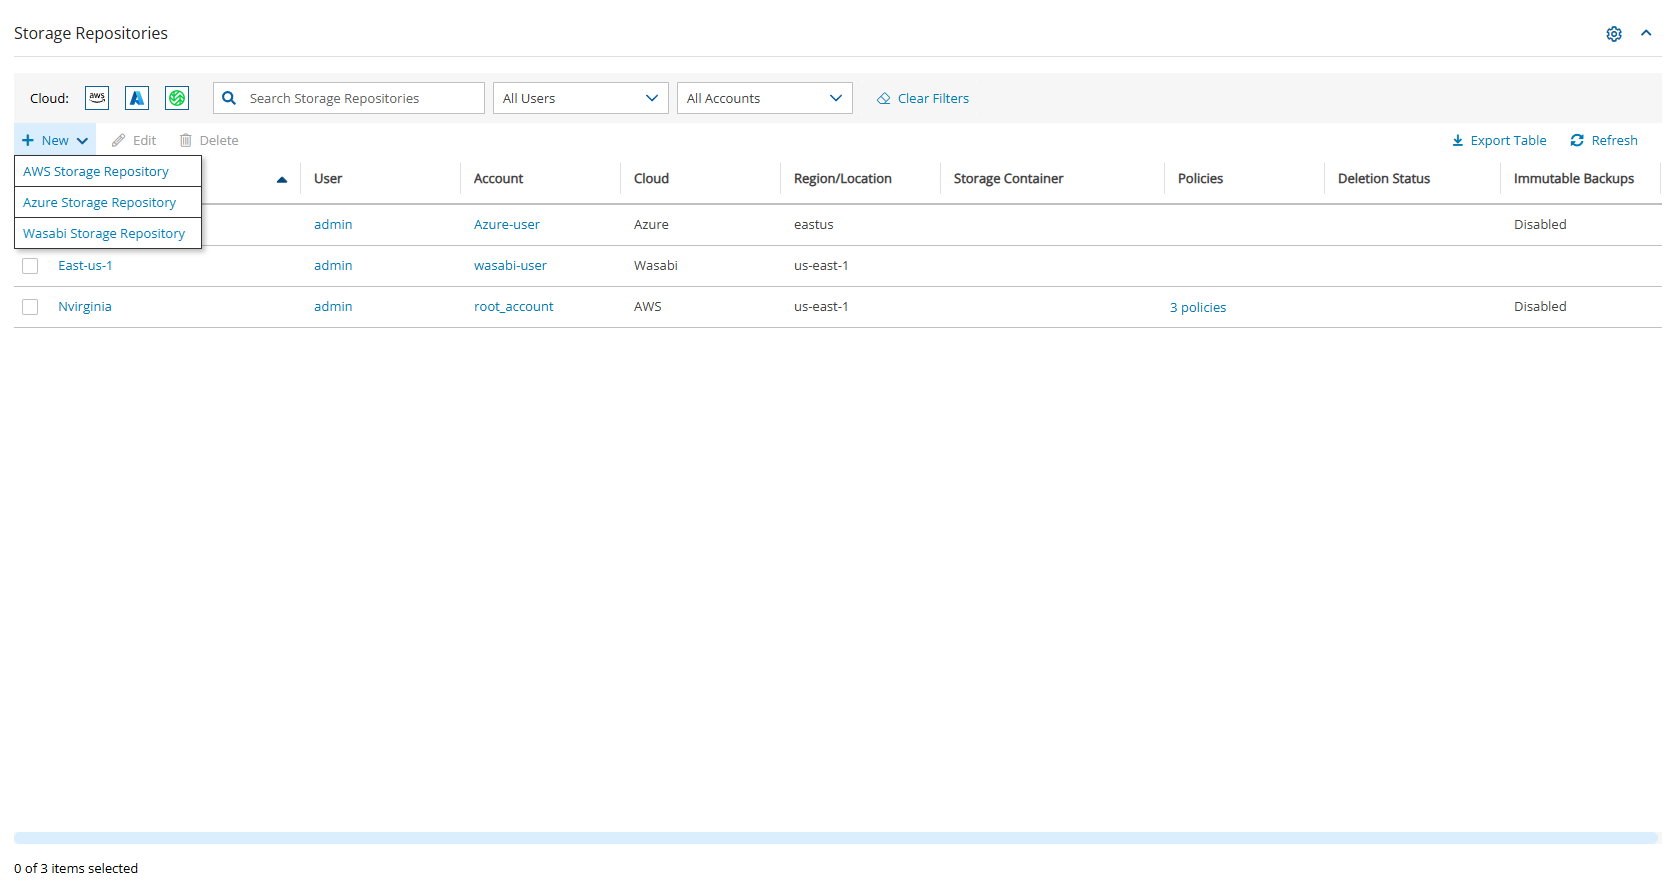
1. In N2W, select the **Storage Repositories** tab.
2. In the  **New** menu, select **Wasabi Storage Repository**.
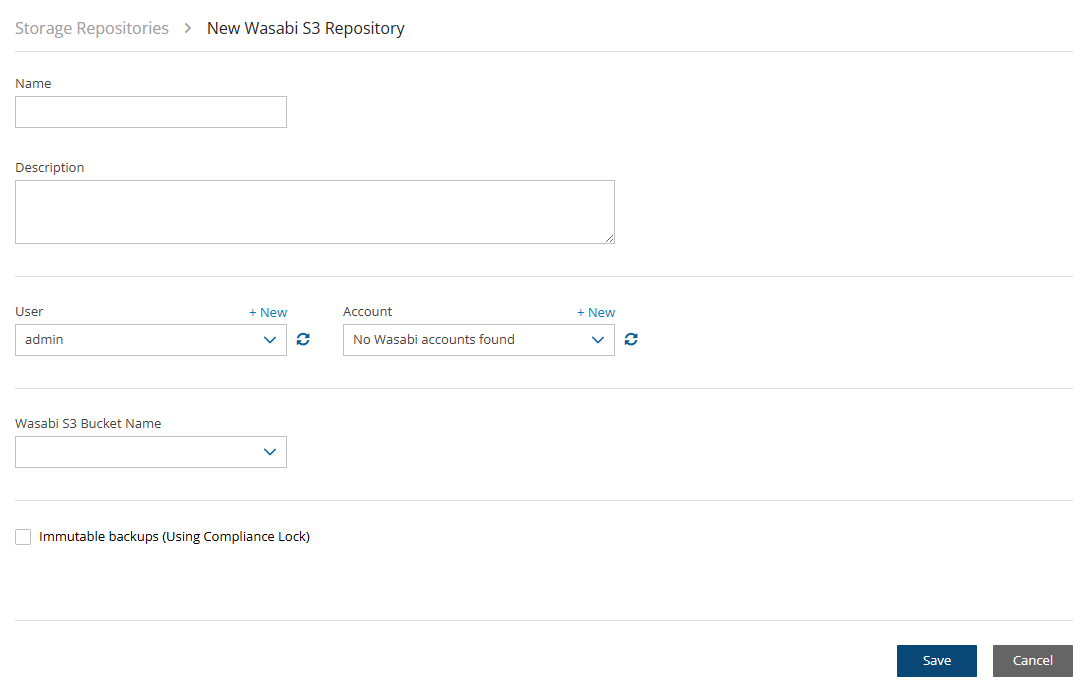
3. In the **Storage Repository** screen, complete the following fields, and then select **Save**.
1. **Name** - Type a unique name for the new repository, which will also be used as a folder name in the Wasabi Repository container. Only alphanumeric characters and the underscore are allowed.
2. **Description** - Optional brief description of the contents of the repository.
3. **User** – Select the user in the list.
4. **Account** - Select the account that has access to the repository.
5. **Wasabi S3 Bucket Name** – Select the name of the S3 bucket from the list.
{% hint style="danger" %}
Do *not* rename this bucket after selection for the Repository as the copy will fail.
{% endhint %}
f. **Immutable backups (Using Compliance Lock)** - Select to enable immutable backups. It will not be possible to delete snapshots before their retention expiration dates in an enabled repository.
### 27.2.2 Deleting a Wasabi Repository
You can delete all snapshots copied to a specific Wasabi repository.
{% hint style="info" %}
Deleting a repository is *not* possible when the repository is used by a policy. You must change the policy’s repository to a different one before you can delete the target repository.
{% endhint %}
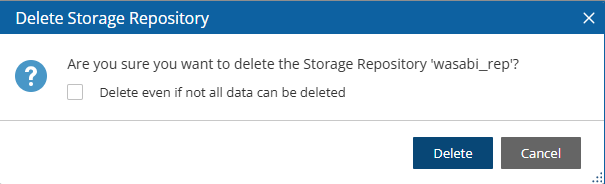
**To delete a Wasabi repository**:
1. Select the **Storage Repositories** tab.
2. Select the repository to delete.
3. Select  **Delete,** and confirm.
### 27.3 Recovering from a Wasabi Repository
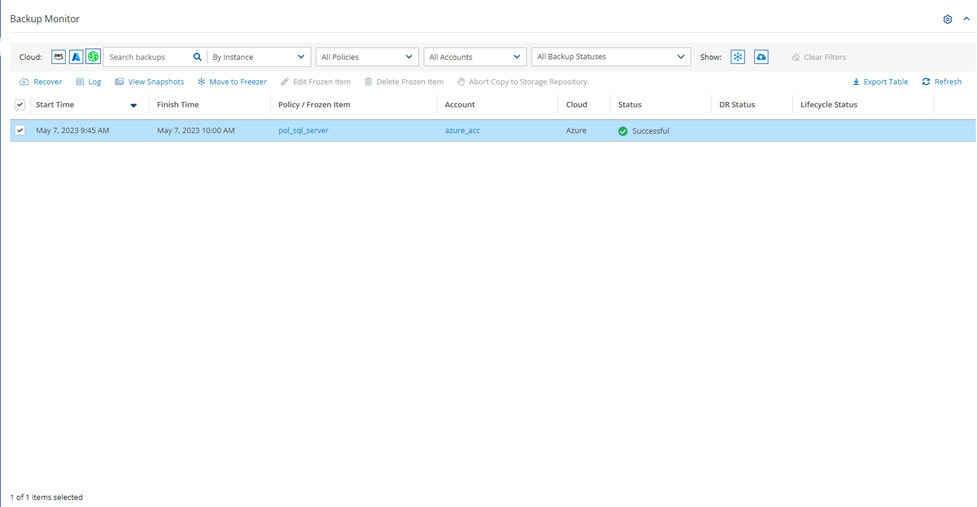
1. In the **Backup Monitor,** select the **Cloud** button for Wasabi .
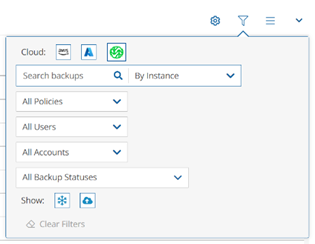
2. To minimize the top bars, select the up arrow in the top right corner. To open the filters dialog box, select the filter icon ( ).
3. Filter as necessary by type of target, policies, users, accounts, backup status, and freezer status.
4\. Select a backup, and then select  **Recover**. The Recover screen opens. For backups with multiple resource types as targets, the Recover screen will have a separate tab for each type.
5\. Follow the recovery instructions for the resource type as described in section [10](https://docs.n2ws.com/user-guide/10-performing-recovery).
 .
4. Complete the New Account screen using the App registration view information.
1. **Name** – Name for this N2W account.
2. **User** – The N2W user that this account belongs to. See section [18](https://docs.n2ws.com/user-guide/18-user-management).
3. **Access Key ID** - ID provided by N2W for authentication.
4. **Secret Access Key** - Key provided by N2W for authentication.
.
4. Complete the New Account screen using the App registration view information.
1. **Name** – Name for this N2W account.
2. **User** – The N2W user that this account belongs to. See section [18](https://docs.n2ws.com/user-guide/18-user-management).
3. **Access Key ID** - ID provided by N2W for authentication.
4. **Secret Access Key** - Key provided by N2W for authentication.
 .
2. To minimize the top bars, select the up arrow in the top right corner. To open the filters dialog box, select the filter icon (
.
2. To minimize the top bars, select the up arrow in the top right corner. To open the filters dialog box, select the filter icon (  ).
).