Appendix D - Datadog Integration
In this section, you will learn how to integrate Datadog with N2W.
N2WS Backup & Recovery Instance is now supporting the monitoring of backups, DR, copy to S3, alerts, and more by Datadog. Datadog is a monitoring service for cloud-scale applications, providing monitoring of servers, databases, tools, and services, through a SaaS-based data analytics platform. Datadog will allow CPM users to monitor and analyze the N2W Backup & Recovery Dashboard metrics.
D.1 Activating Datadog and Monitoring N2W
Use the following procedure to activate Datadog. Ready-made dashboards for monitoring are included.
To activate the service and to monitor your N2WS instance:
Setup Datadog Account.
Visit Datadog at https://www.datadoghq.com/pricing/ and set up an account that fits your scale.
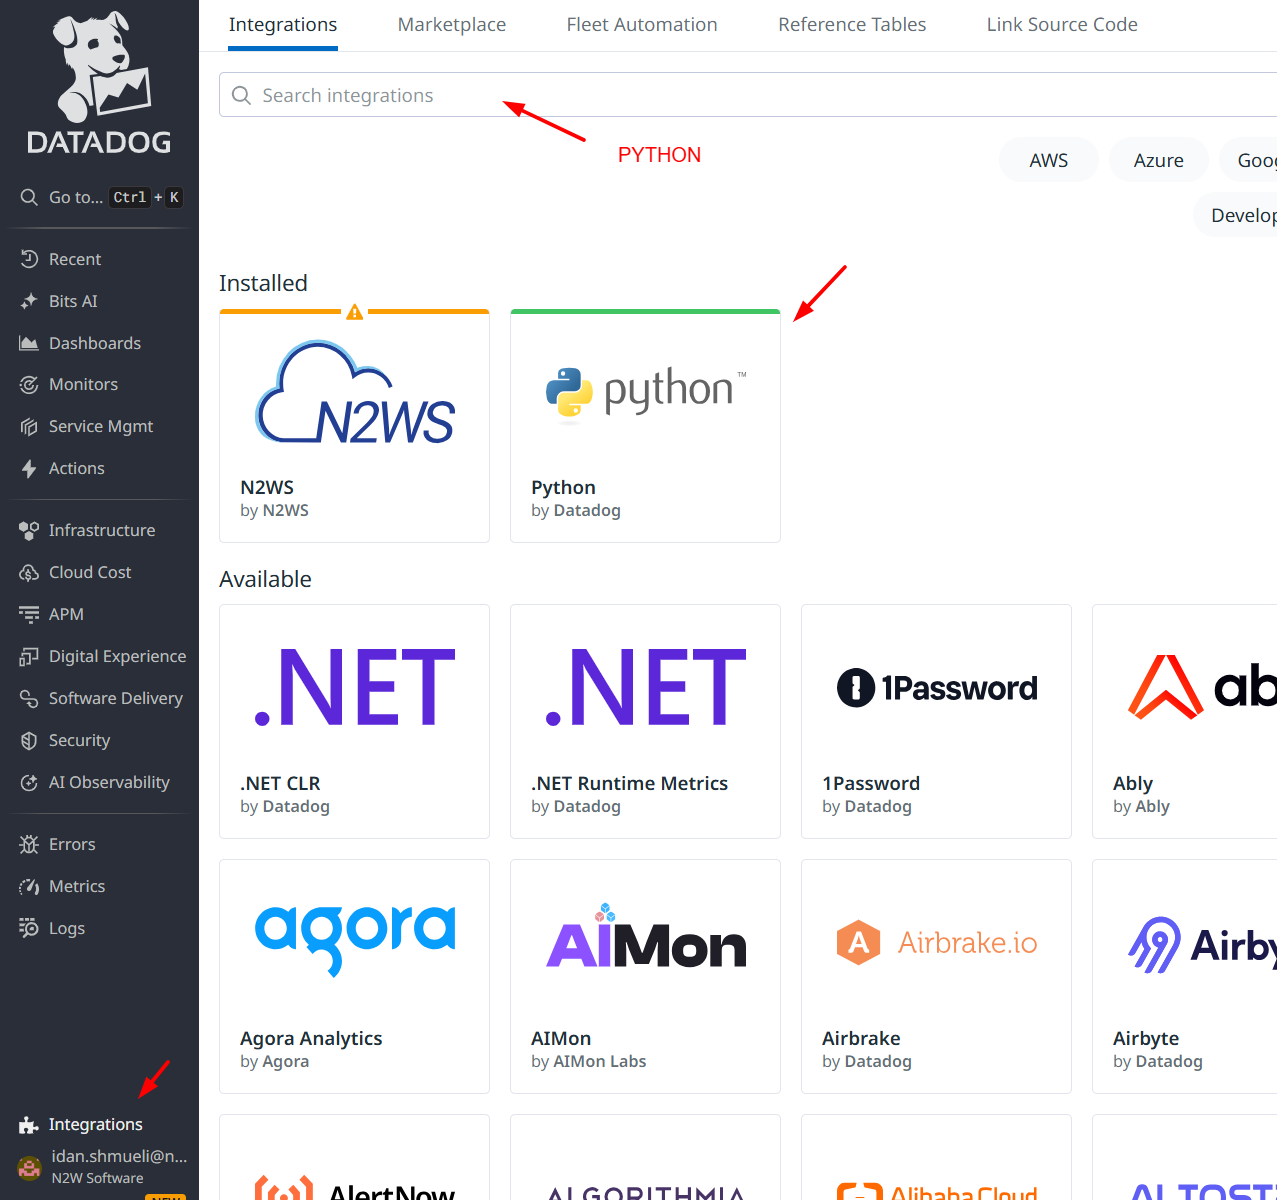
Install Python Integration.
a. Login to Datadog and go to Integrations.
b. Search for ‘Python’ and install it:

c. Search for 'N2WS' and install it. See step 6.
3. Enable Datadog support on N2WS Instance.
a. Connect to your N2WS Backup & Recovery Instance with SSH Client.
b. Type sudo su.
c. Add the following lines to /cpmdata/conf/cpmserver.cfg:
If cpmserver.cfg doesn't exist, create, and add the above lines.
d. Run service apache2 restart.
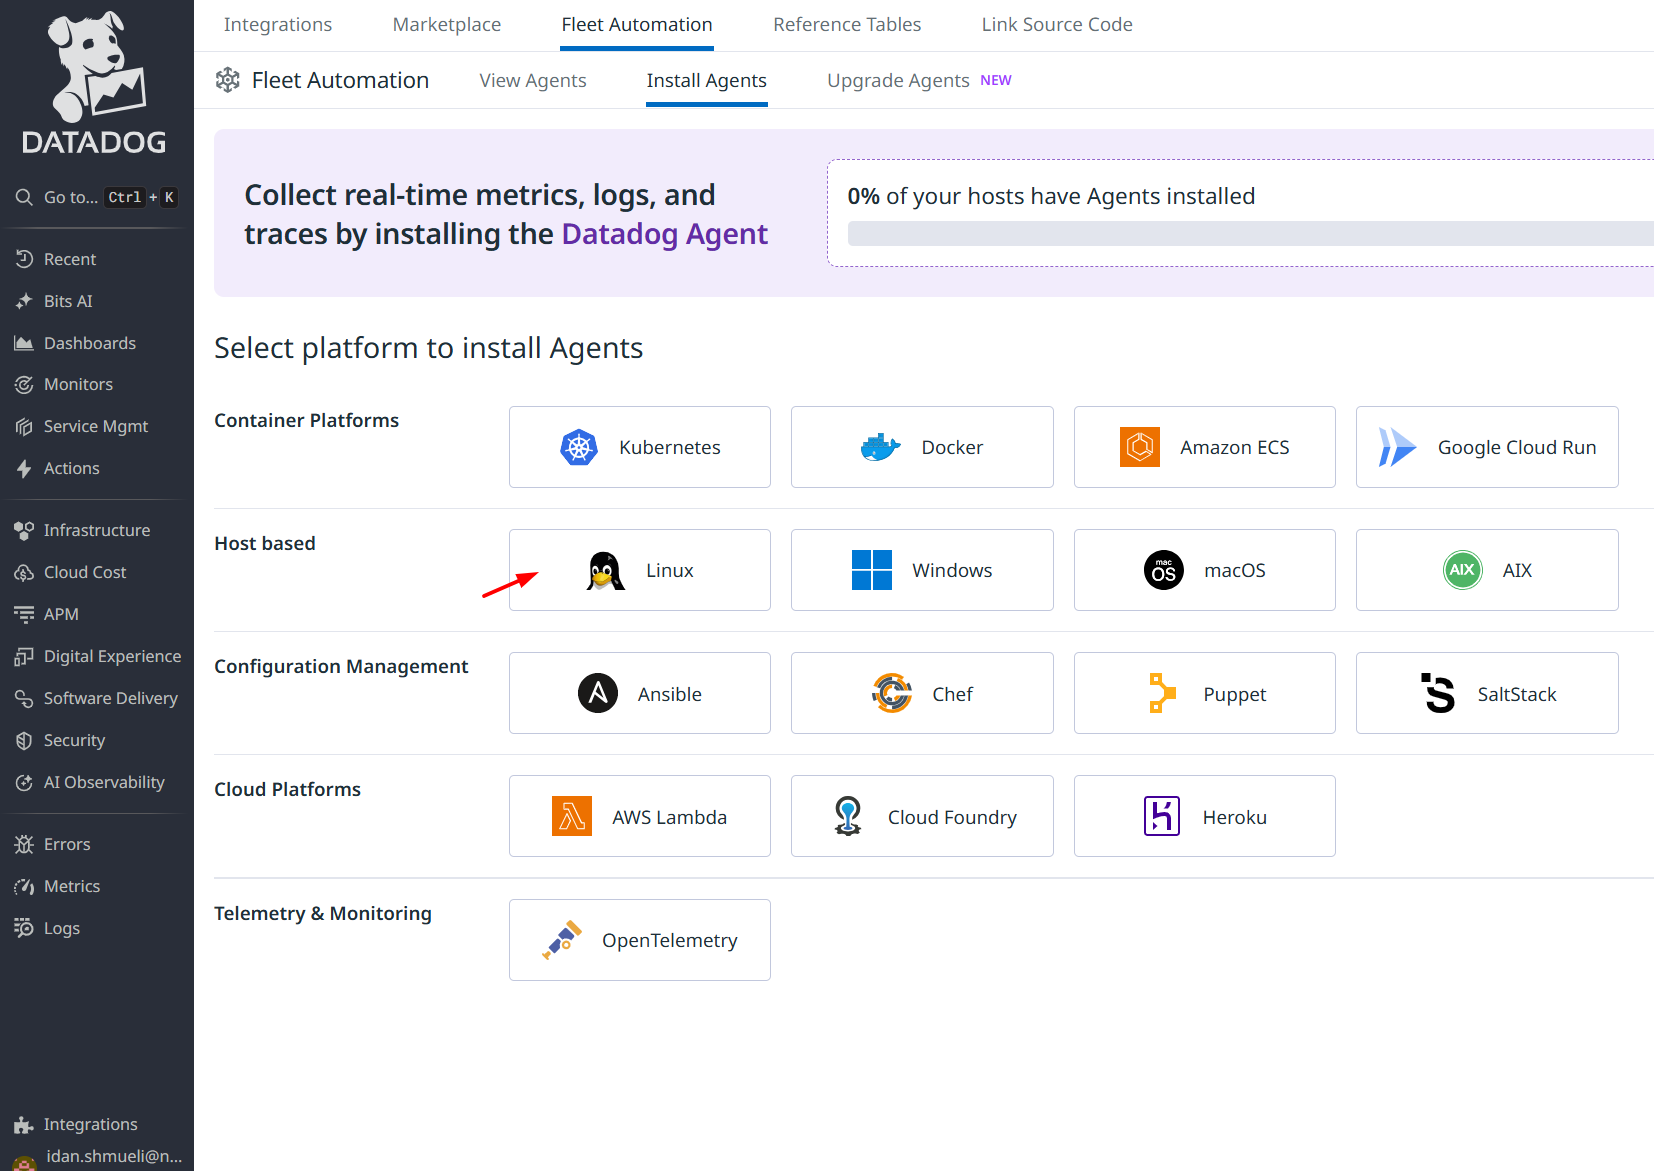
4. Install Datadog Agent on N2WS Instance. a. Login to Datadog and go to Integrations > Install Agents > Linux:

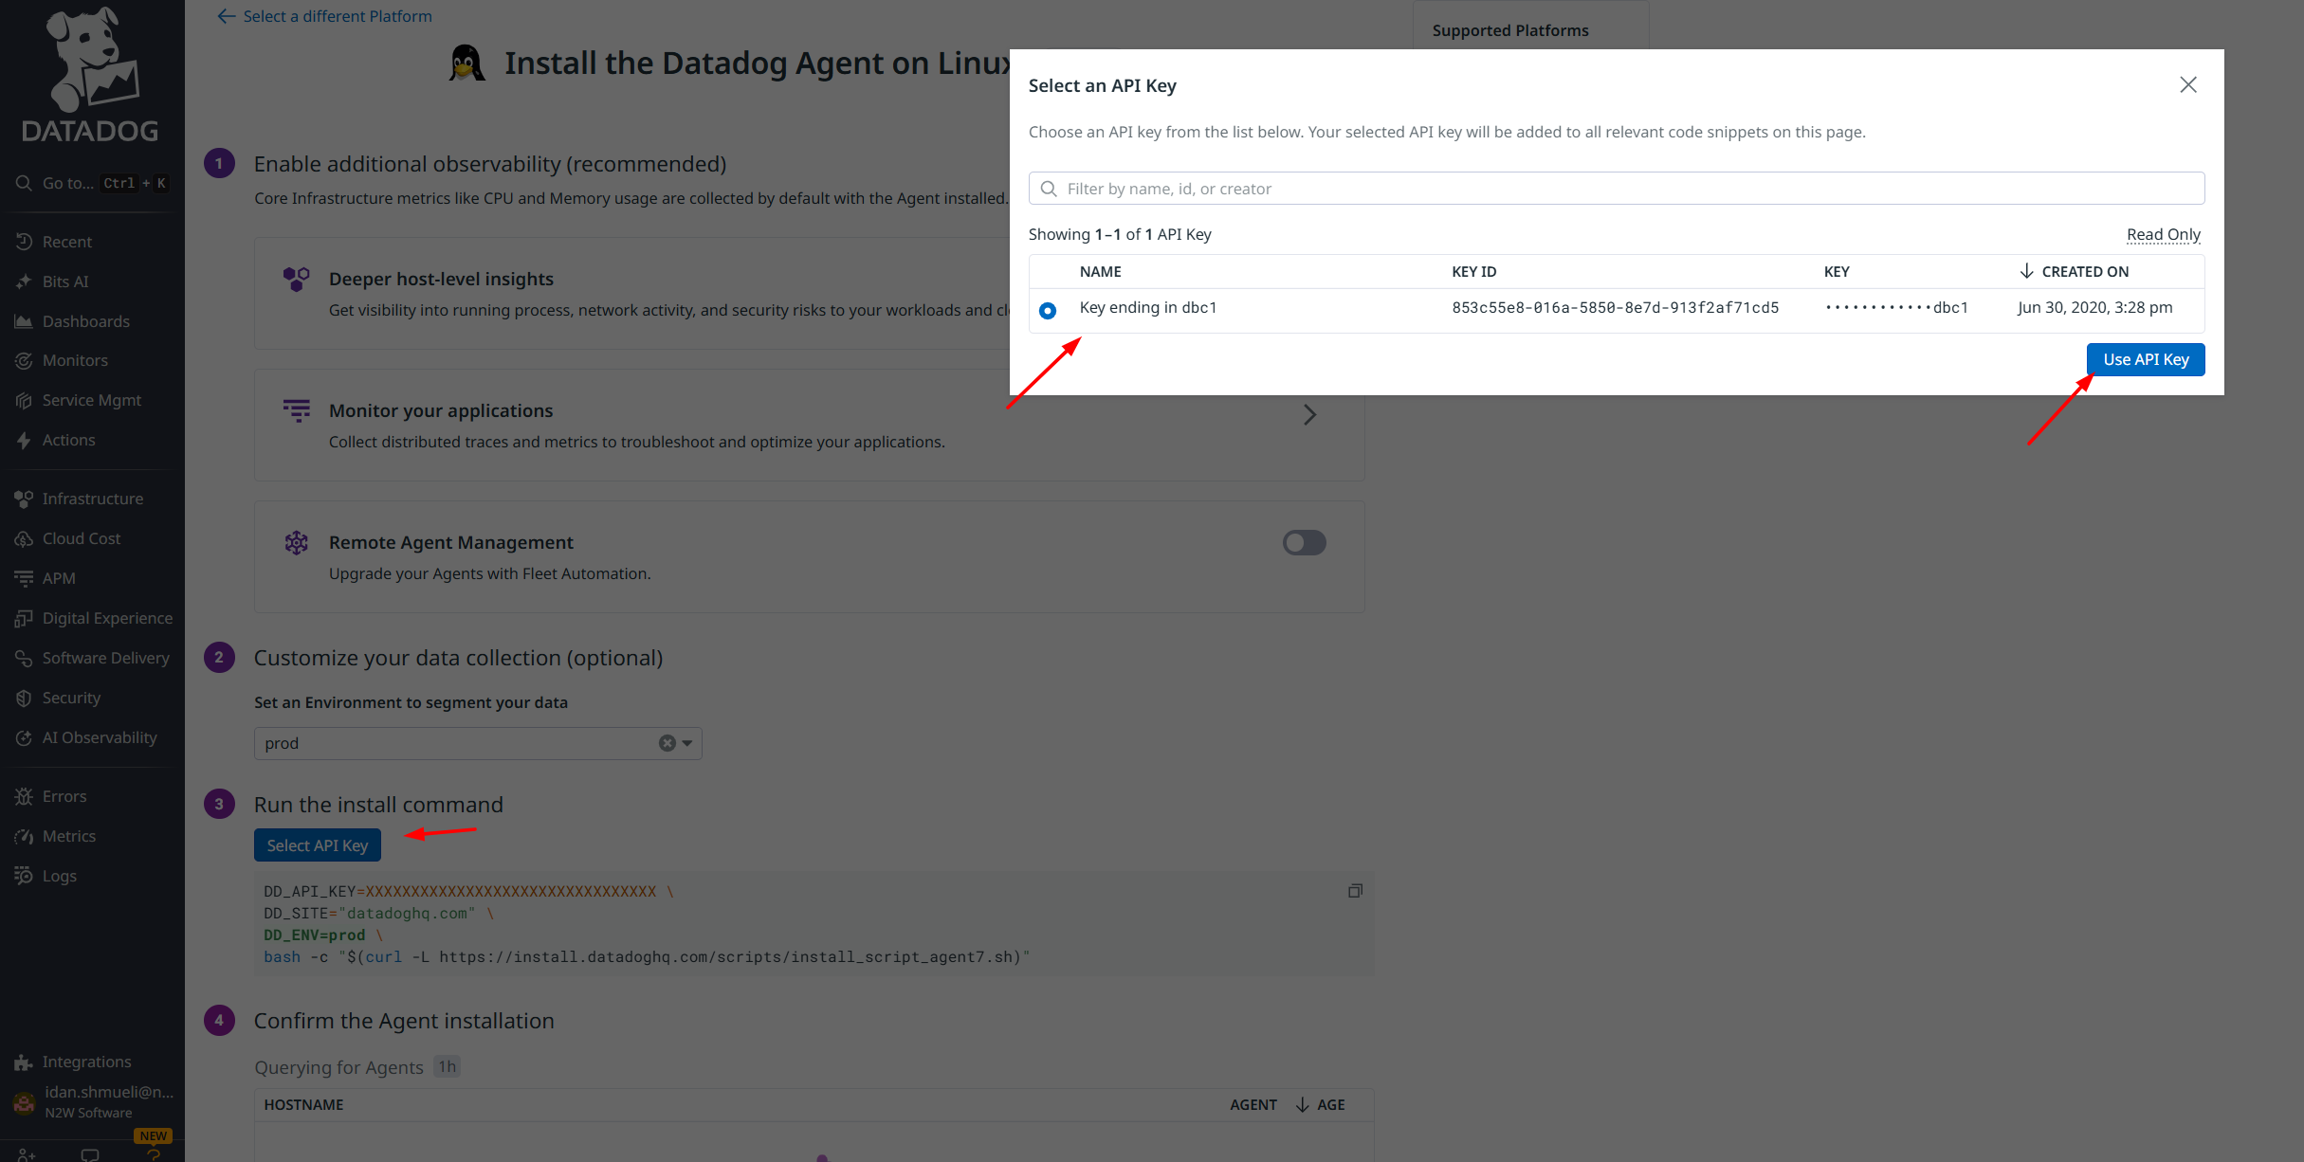
b. In step 3 of the Install the Datadog Agent on Linux page, create the install command by selecting an API Key, and then selecting Use API Key.

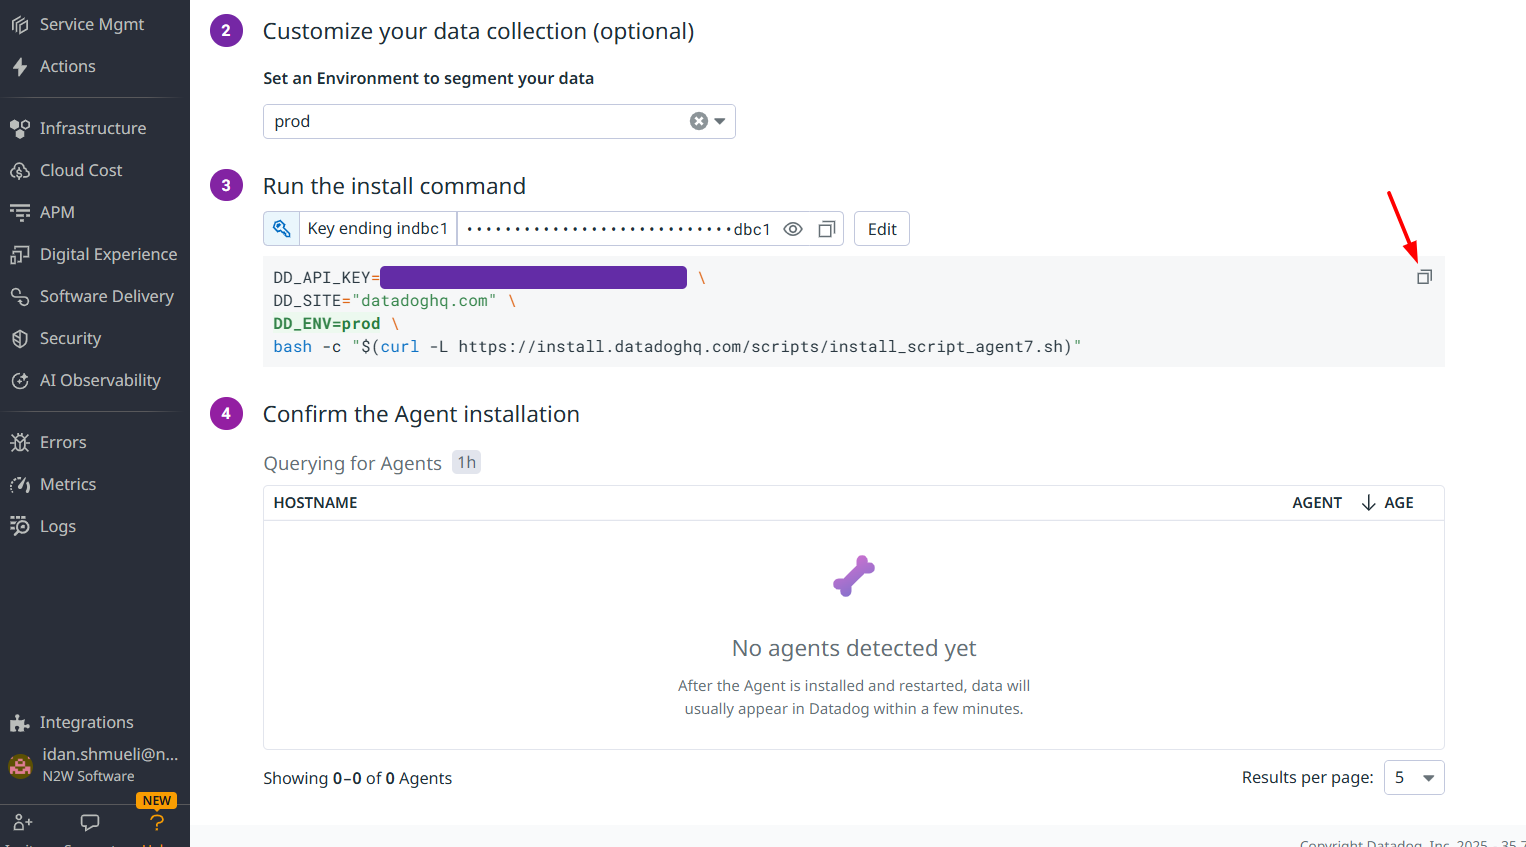
c. Use the copy icon in the upper right corner of the code block to copy the entire agent install command.

d. Connect to your N2WS Backup & Recovery Instance with SSH Client, type sudo su and run the agent Install command.
e. Restart the Datadog Agent: sudo service datadog-agent restart
Datadog updates N2W metrics hourly.
5. Setup Datadog Dashboard metrics.
a. Log in to Datadog and go to Metrics > Explorer.
b. In the Graph list, select your metrics. All N2W metrics begin with cpm_ followed by <metric-name>.

c. In the Over list, select data. You can either select a specific user or the entire N2WS instance. All N2W user data begins with cpm:user: followed by <user-name>.

6. Configure your Datadog dashboard by using the N2WS template or creating your own dashboards, and choose the data to monitor. a. To use the N2WS template, in Datadog Integrations at https://app.datadoghq.com/account/settings#integrations, search for the 'N2WS' tile and install it. You will get a variety of dashboards for your account. Dashboards are named 'N2WBackup&Recovery-<dashboard_name[-version]>'. When dashboards are added for a new N2W version, the dashboards will contain the version number, such as '3-2-0' and '4-0-0'. Version numbers indicate which dashboards are valid for versions going forward. b. To create a Datadog dashboard: i. Go to Dashboards and select New Dashboard.

ii. Add a graph type by dragging and dropping its template to the dashboard:

iii. Edit the graph for the data to be monitored:

iv. Save the graph settings.

7. View N2WS Alerts on Datadog Events. a. Log in to Datadog and go to Events. b. View your instance alerts:

D.2 Monitoring N2W with Web Proxy
If you have restricted outbound traffic, you can proxy all Datadog Agent traffic through different hosts.
Connect to your N2WS Backup & Recovery Instance with SSH Client.
2. Enable proxy: section on datadog.yaml.
3. Add your proxy IP, port, username, and password:
4. Validate datadog.yaml on https://yamlchecker.com/.
Example:
For additional proxy configuration options, see https://docs.datadoghq.com/agent/proxy/
Was this helpful?

